AI-Generated Manual Scenarios
AI-assisted Test Case Authoring empowers manual testers to efficiently create test cases using artificial intelligence. This approach reduces the time and effort involved in test design while enhancing accuracy, consistency, and overall test coverage. It streamlines the authoring process and enables testers to focus on higher-value validation activities.
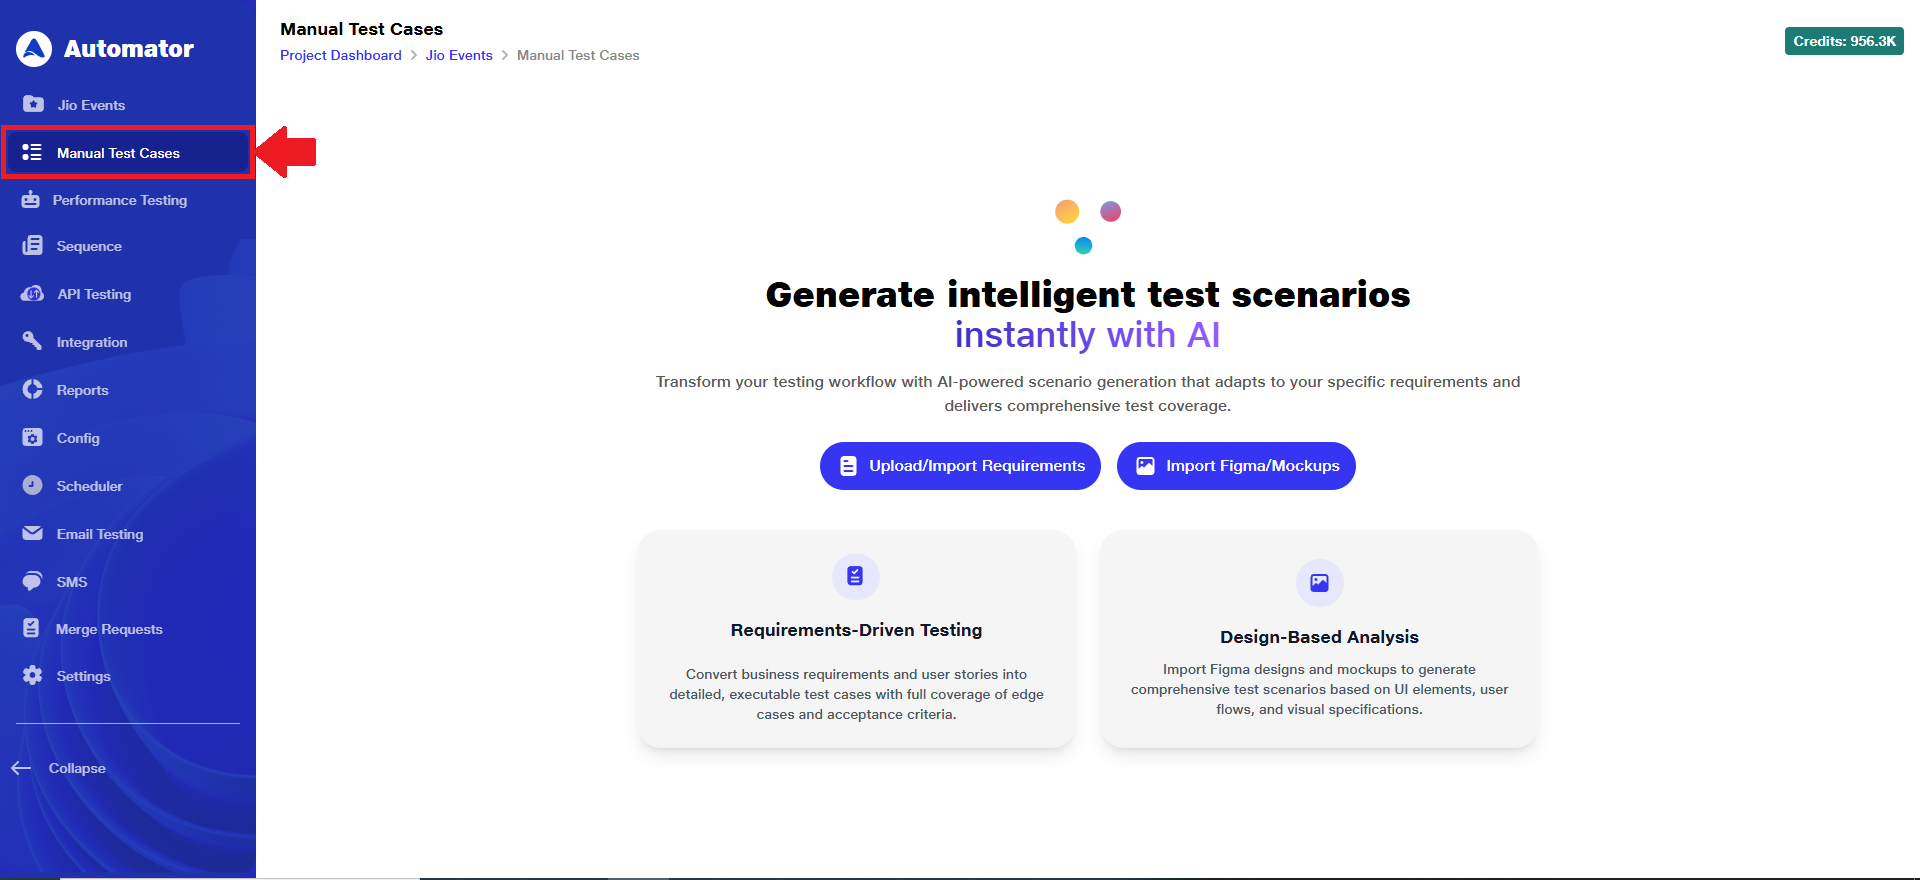
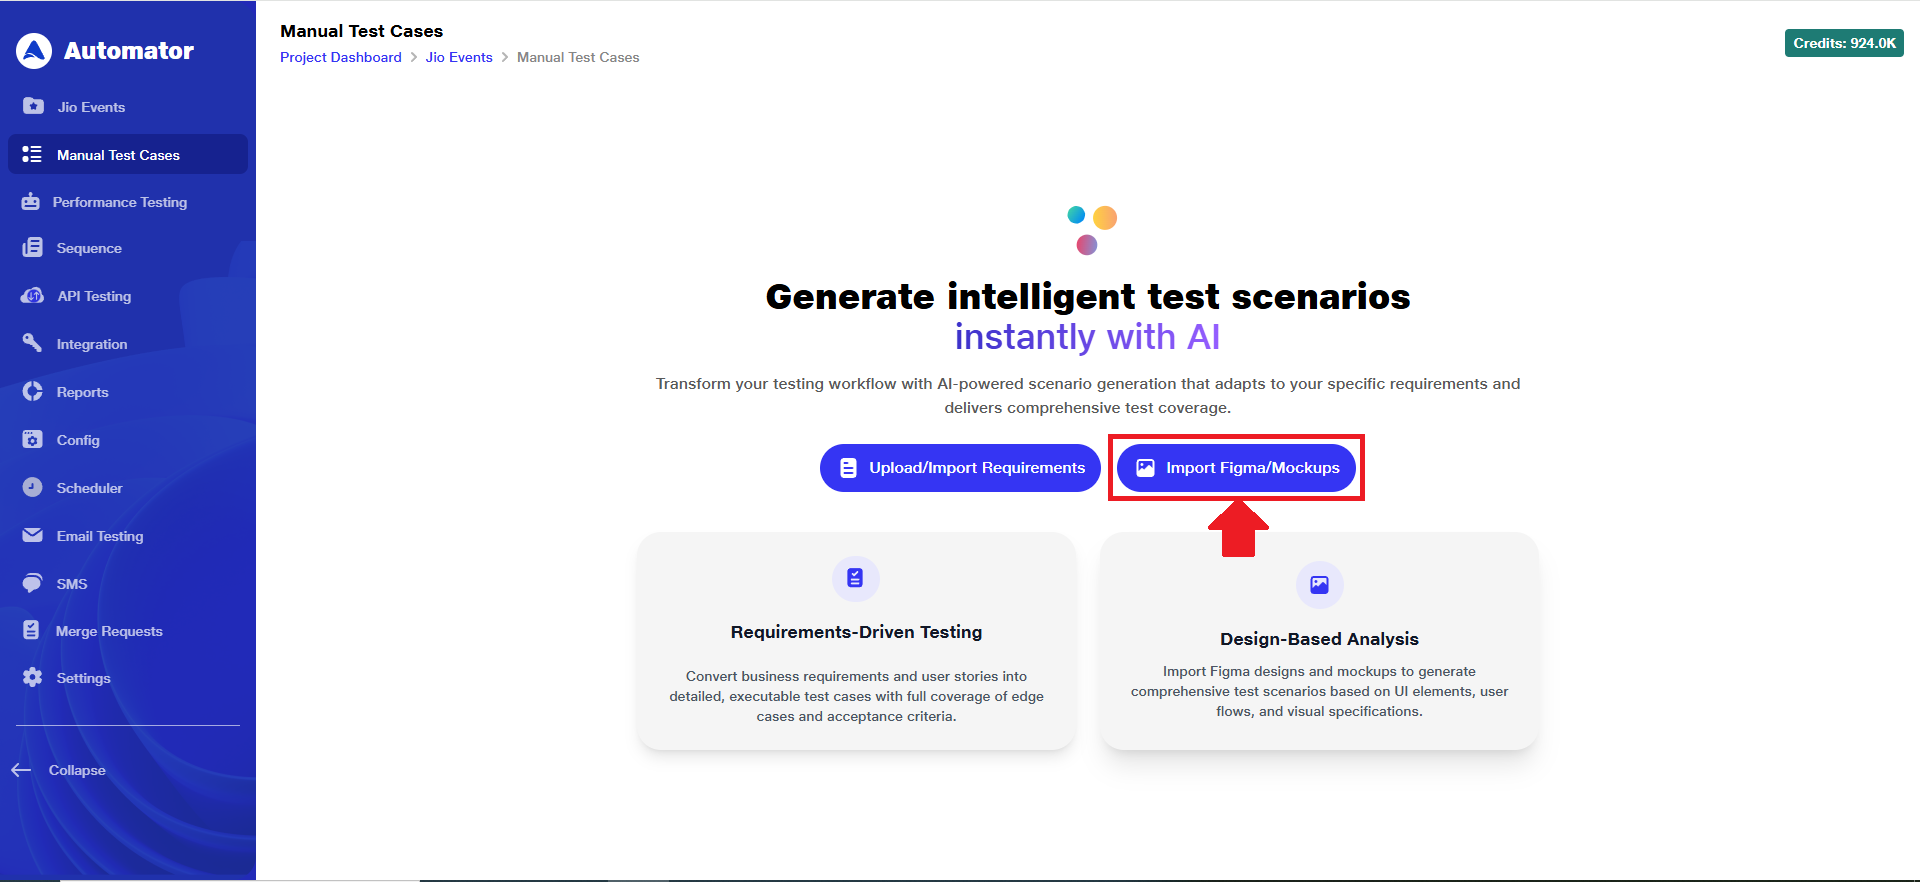
1) Location of AI-Powered Test Generator
a. Navigate to the Manual Test Case page of your project.
2) Manual Test Scenario Generation Methods
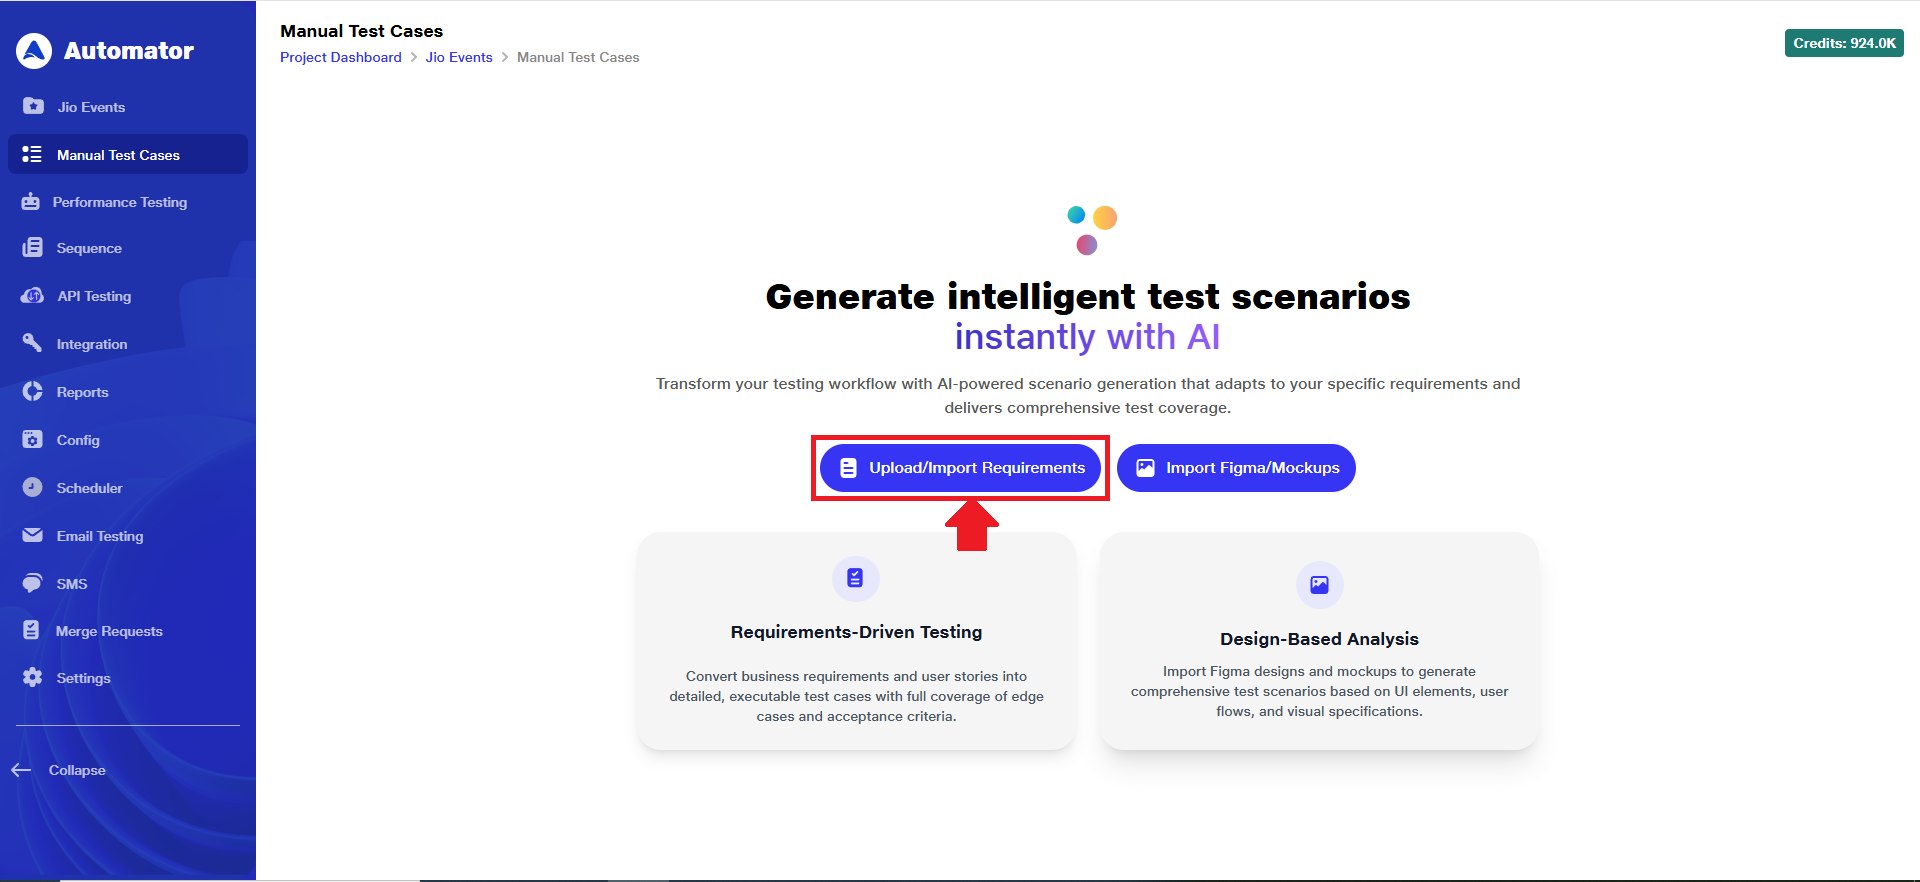
a. You can streamline your testing process by generating scenarios from either documents or a design file.
i) Upload/ Import Requirements: Upload or import business requirements, user stories, or functional specifications to automatically generate detailed, executable test scenarios. The AI ensures full coverage by identifying edge cases, acceptance criteria, and logical conditions aligned with your specific needs.
 ii) Import Figma/ Mockups: Import Figma designs or UI mockups to generate manual test scenarios based on visual specifications, user interface components, and interaction flows. The AI analyzes layouts and behaviors to ensure end-to-end UI and UX validation.

3) Steps to Execute Upload/Import Requirements
a. To get started with requirements-based manual scenario generation, click on 'Upload/Import Requirements'.
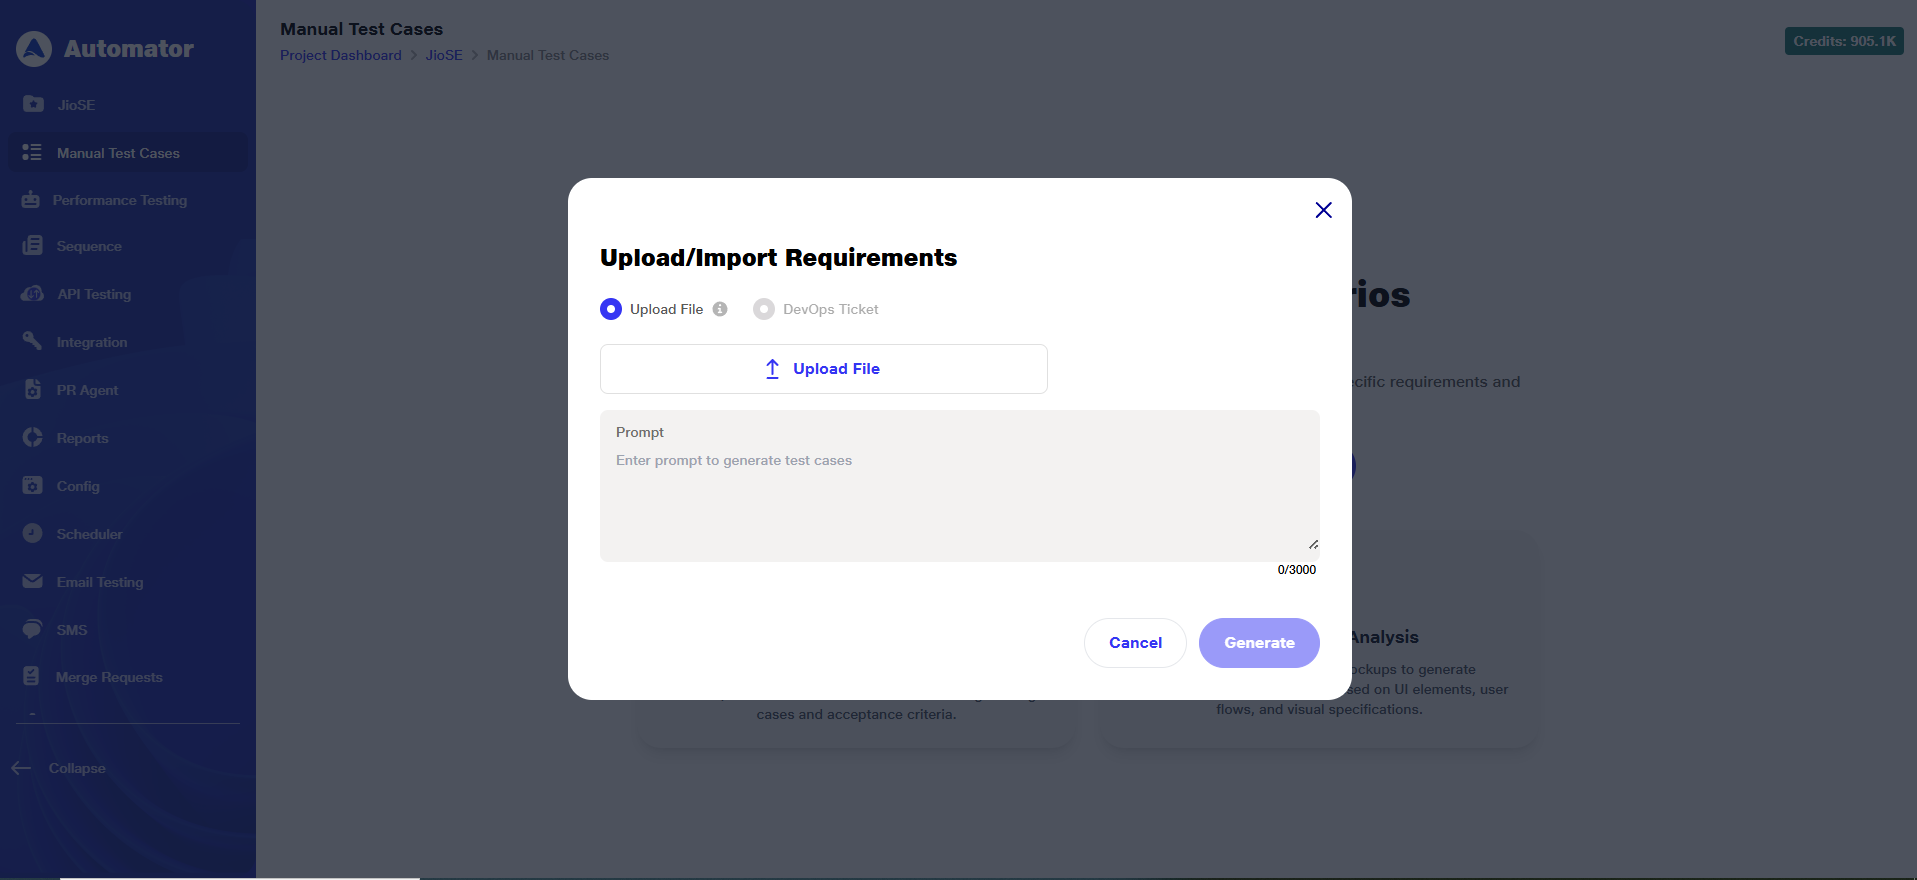
 b. Clicking above mentioned button will open an input panel where you can either:
i) Upload a file containing your business requirements, user stories, or specifications using the Upload File option. The file size must be between 1 KB to 100 MB and supported file type must be .pdf only or
ii) Select the DevOps Ticket (radio button) option to fetch requirements directly from your DevOps system.
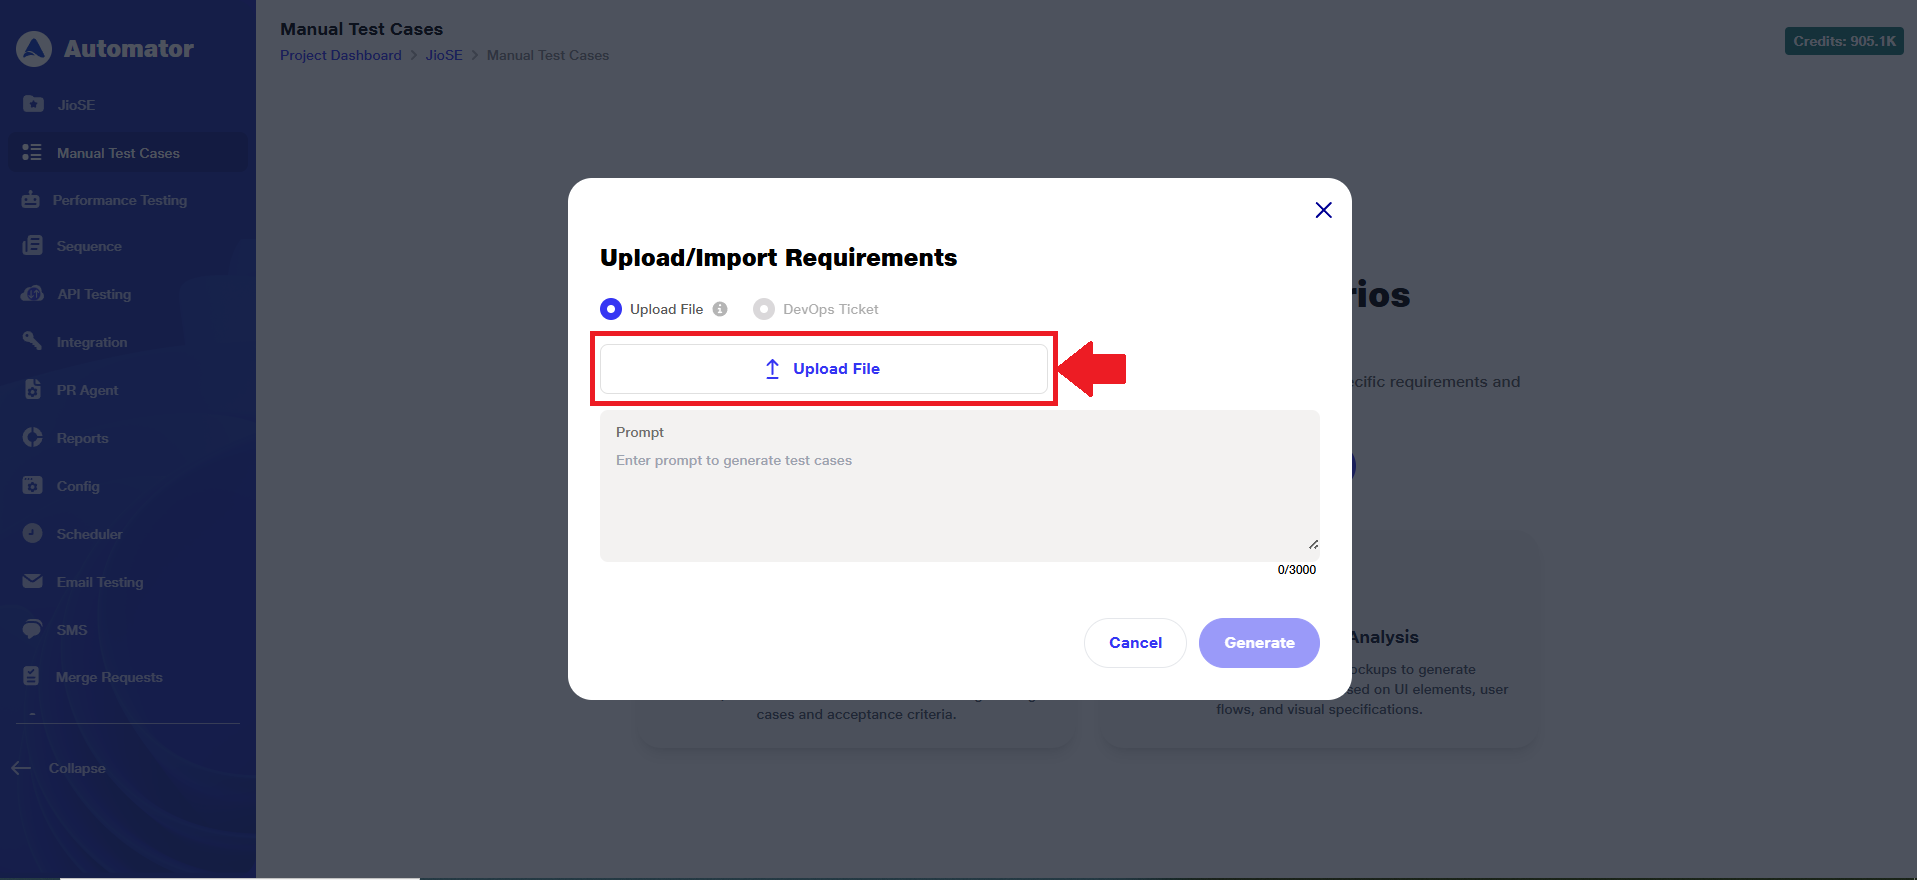
 c. To continue with the Upload File, click on the Upload File button.
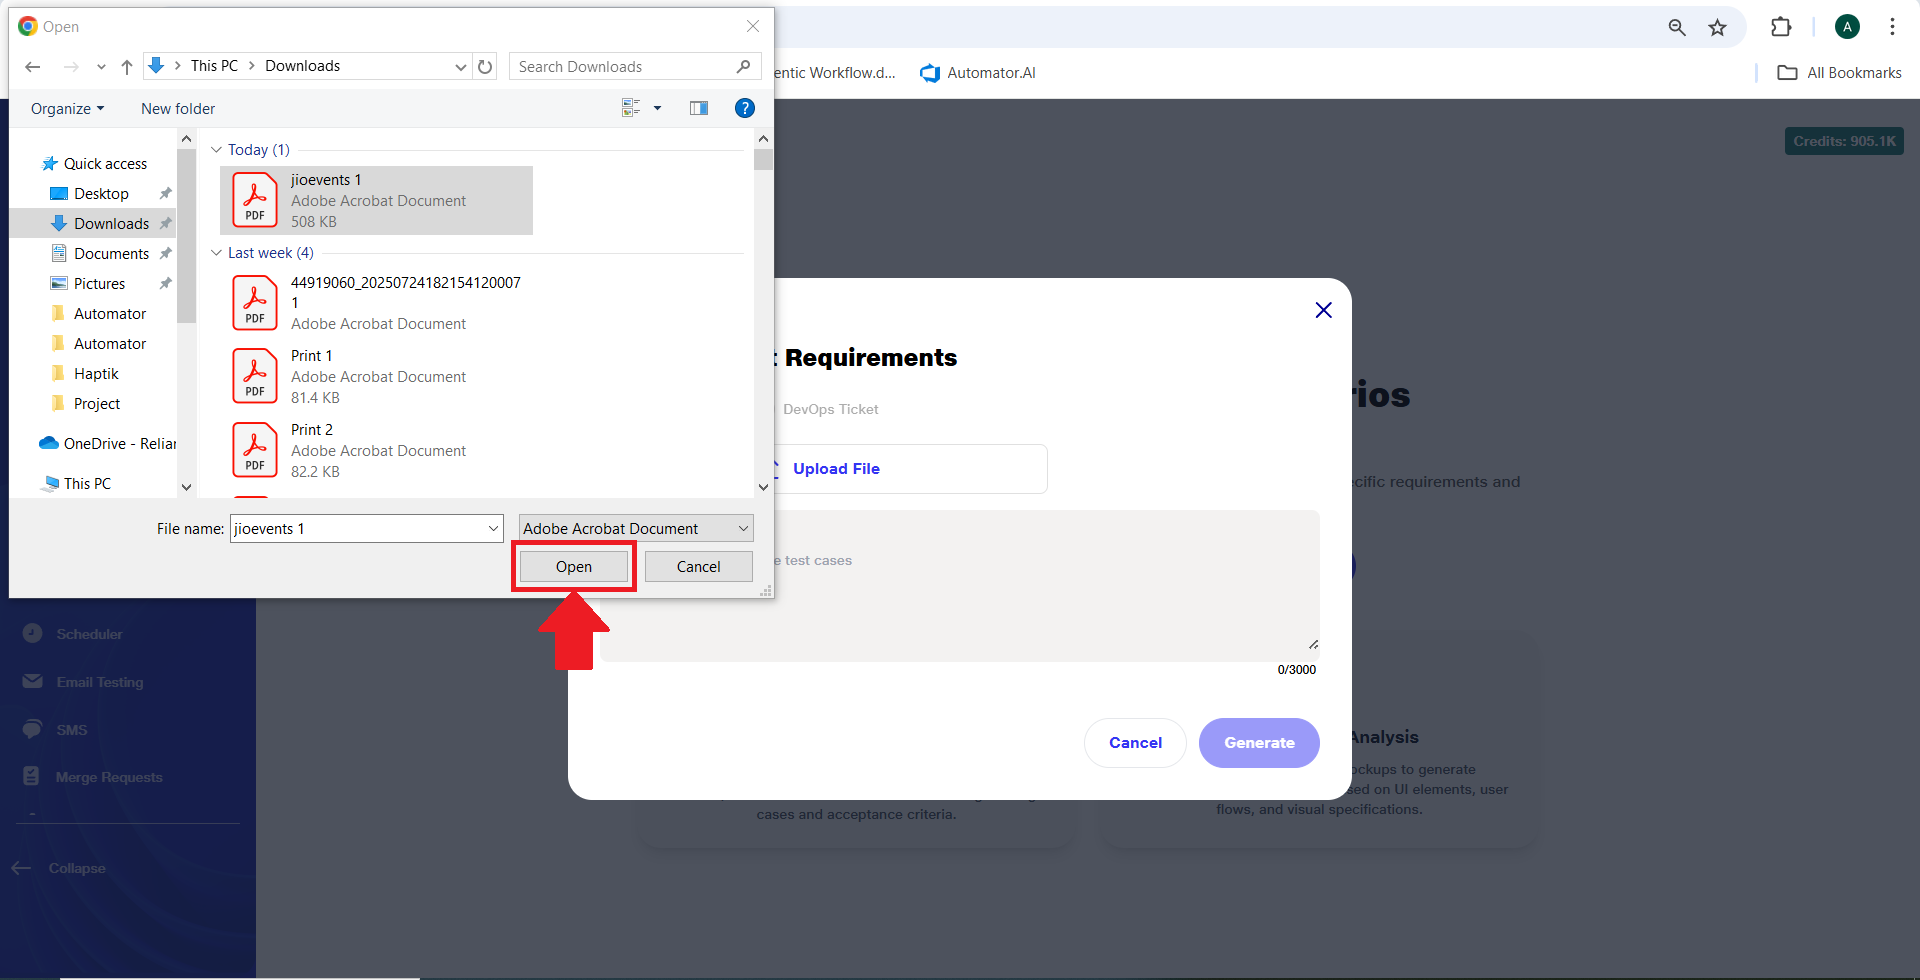
 d. Browse and choose the document containing your requirements.
e. Once selected, click 'Open' to upload the file for AI-powered test scenario generation.
 f.Once the file is uploaded, a clickable file appears, allowing the user to view the file in a new tab.
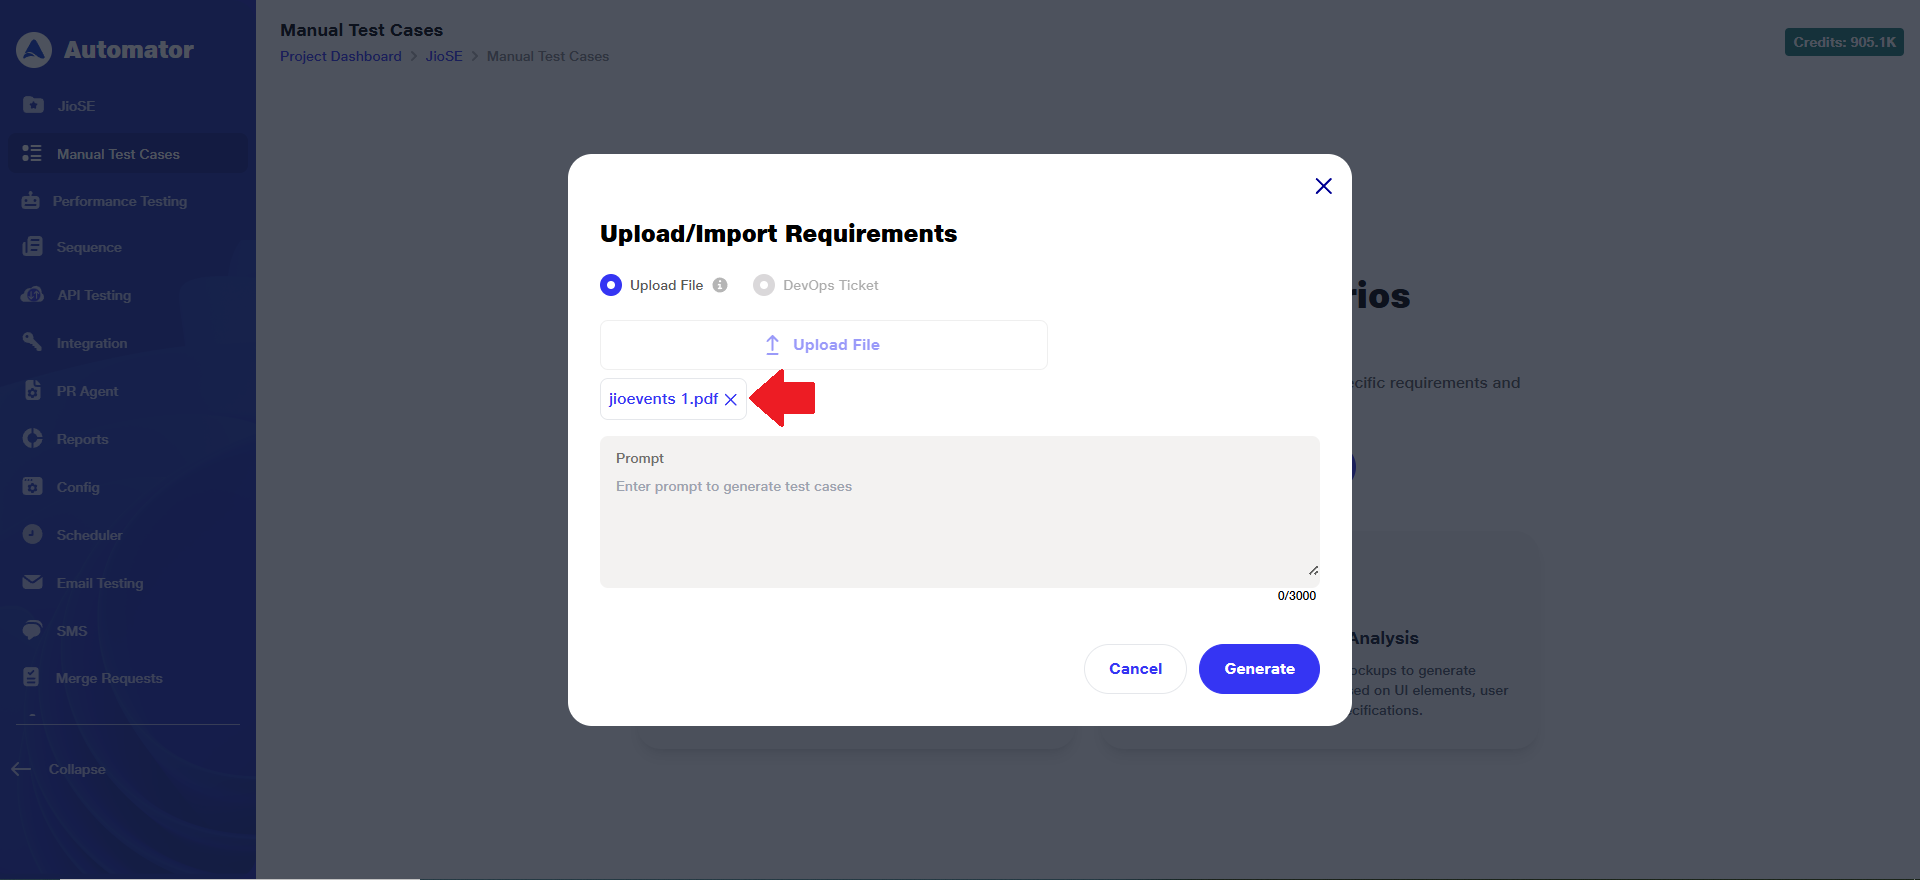 g. The Generate button becomes active on uploading a file.
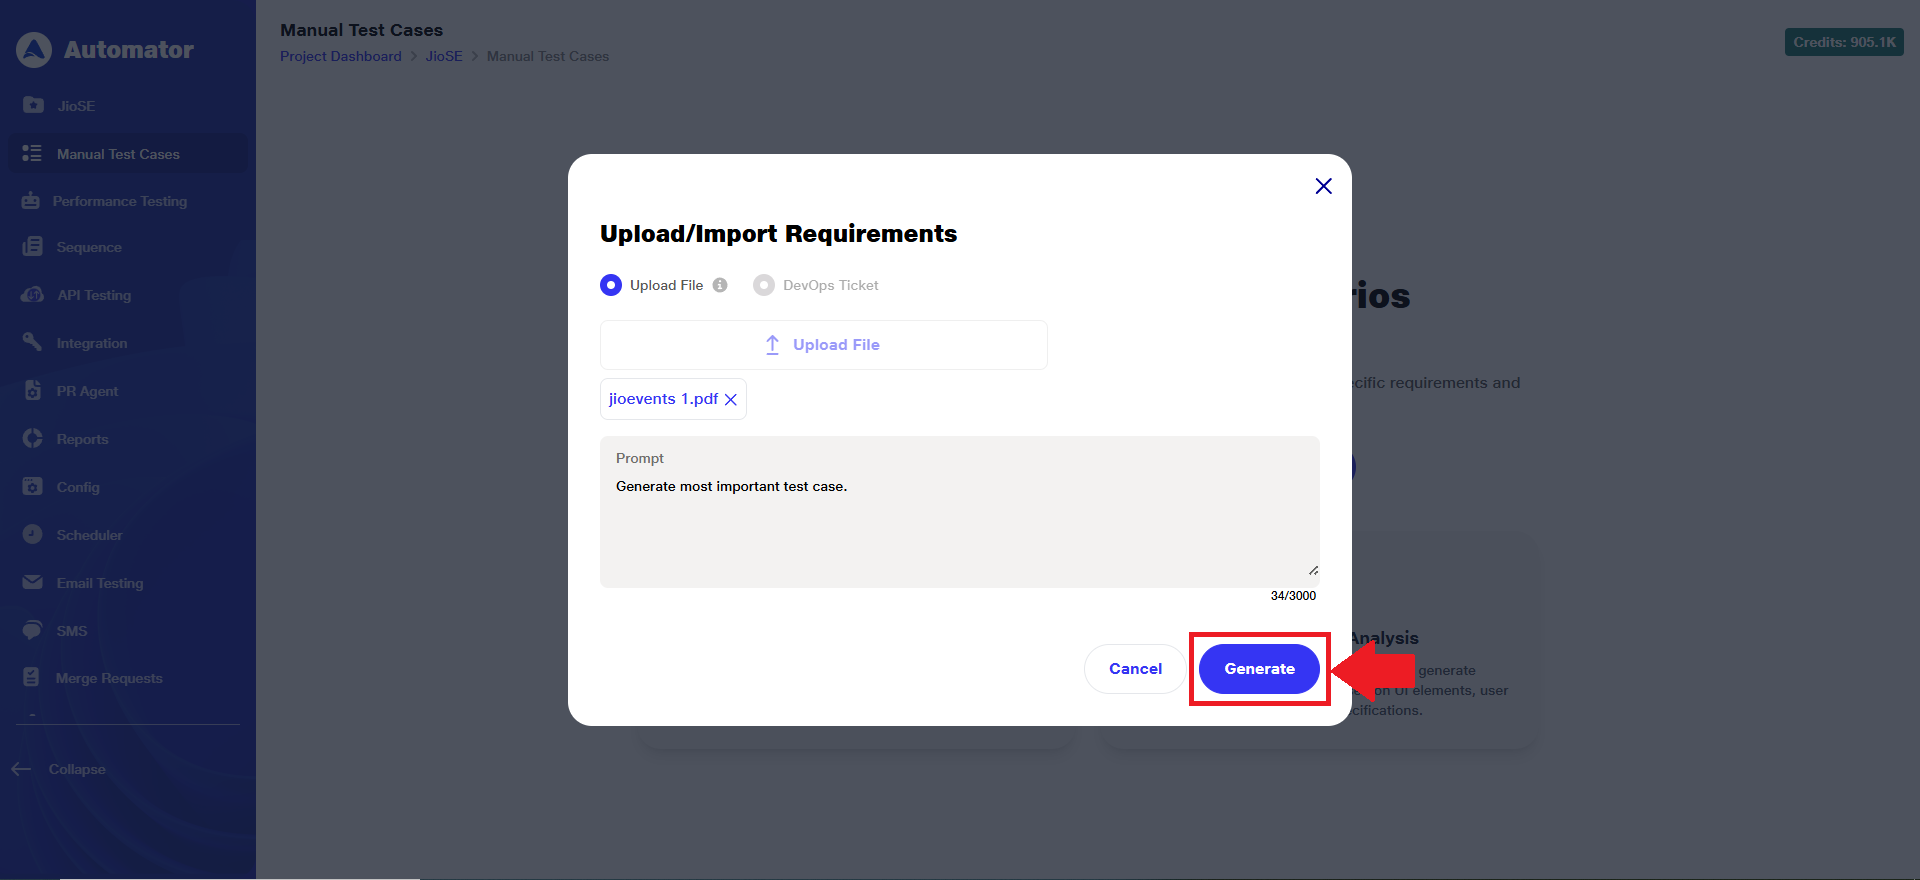
h.You can enter a custom prompt to guide the AI in tailoring the test scenarios.
i. After that, click 'Generate' to initiate the scenario creation process.
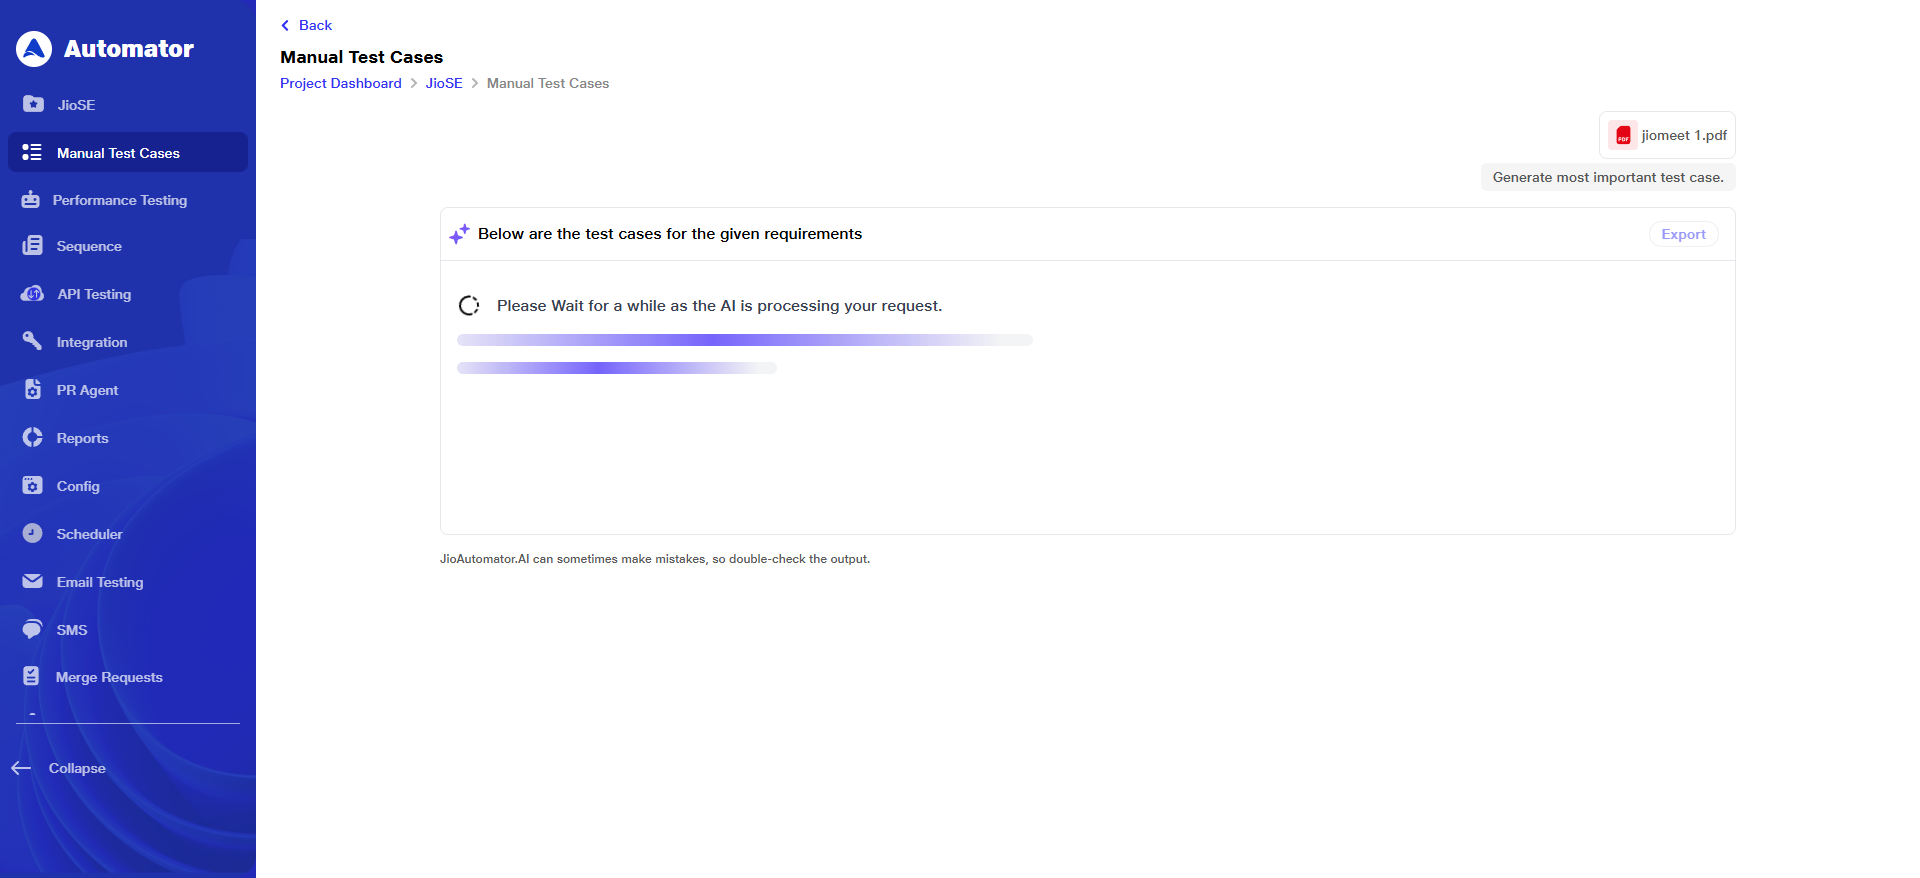
 j. It may take a few seconds to generate test scenarios.
 k.Once the test cases load, the list of test scenarios with their corresponding test steps will be displayed on the screen.
 l. To edit or export, please refer to points 5 and 6.
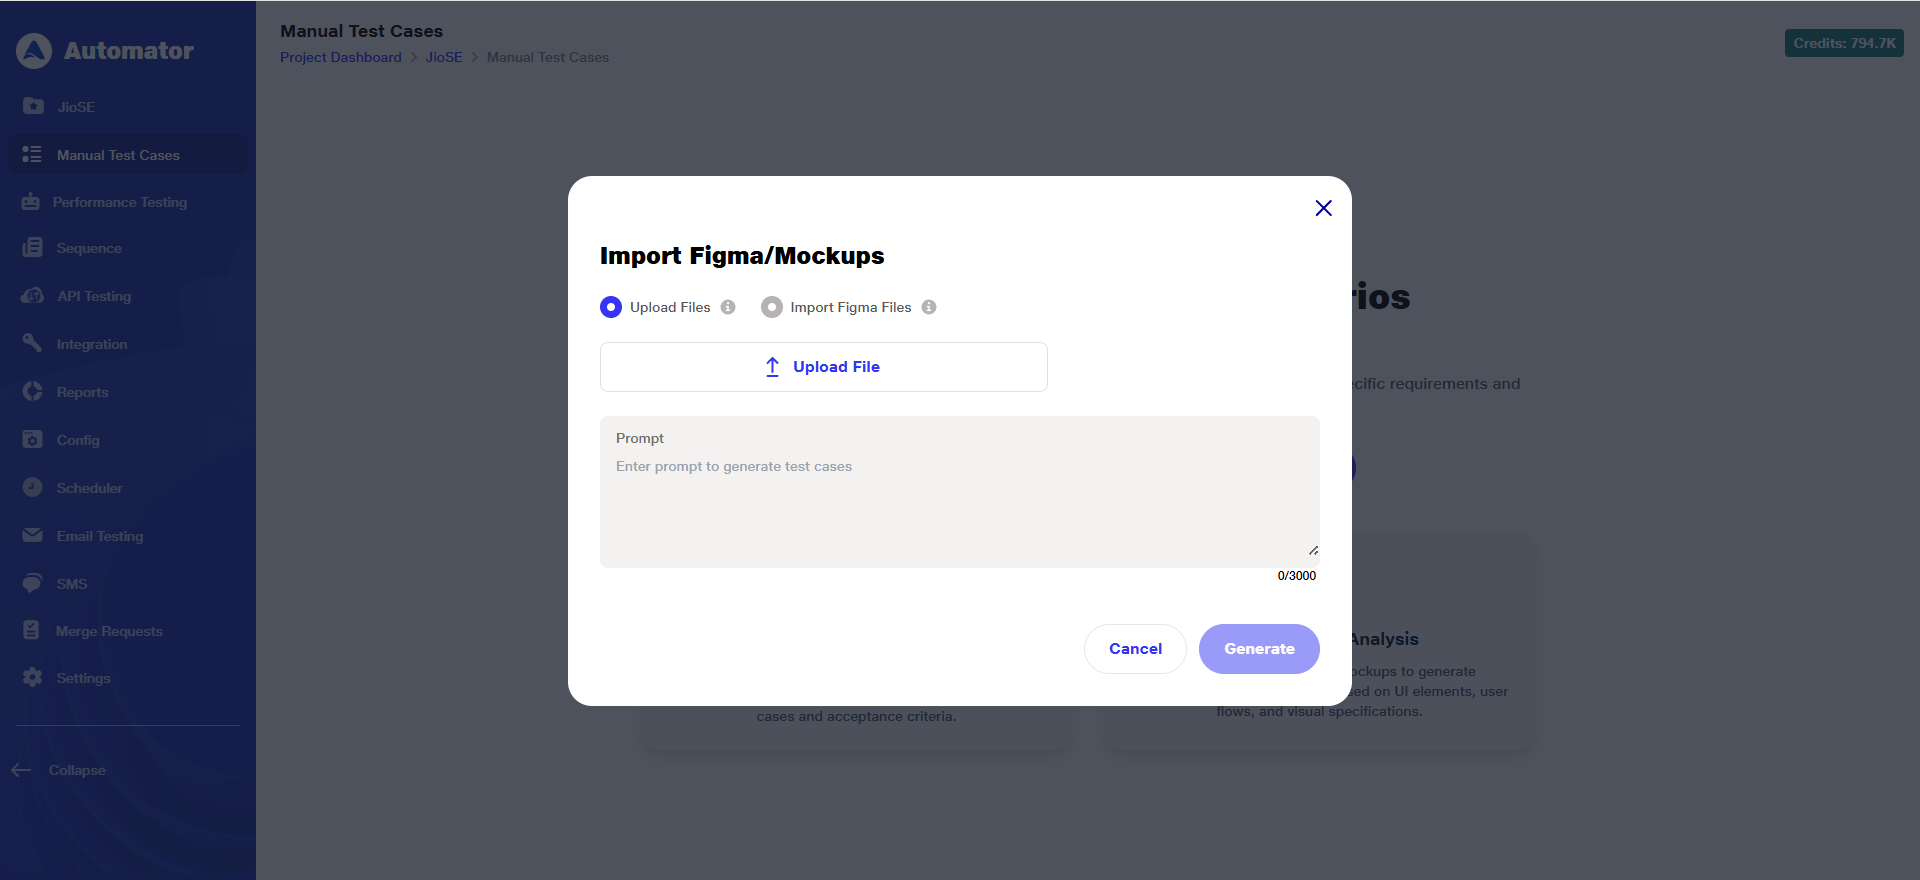
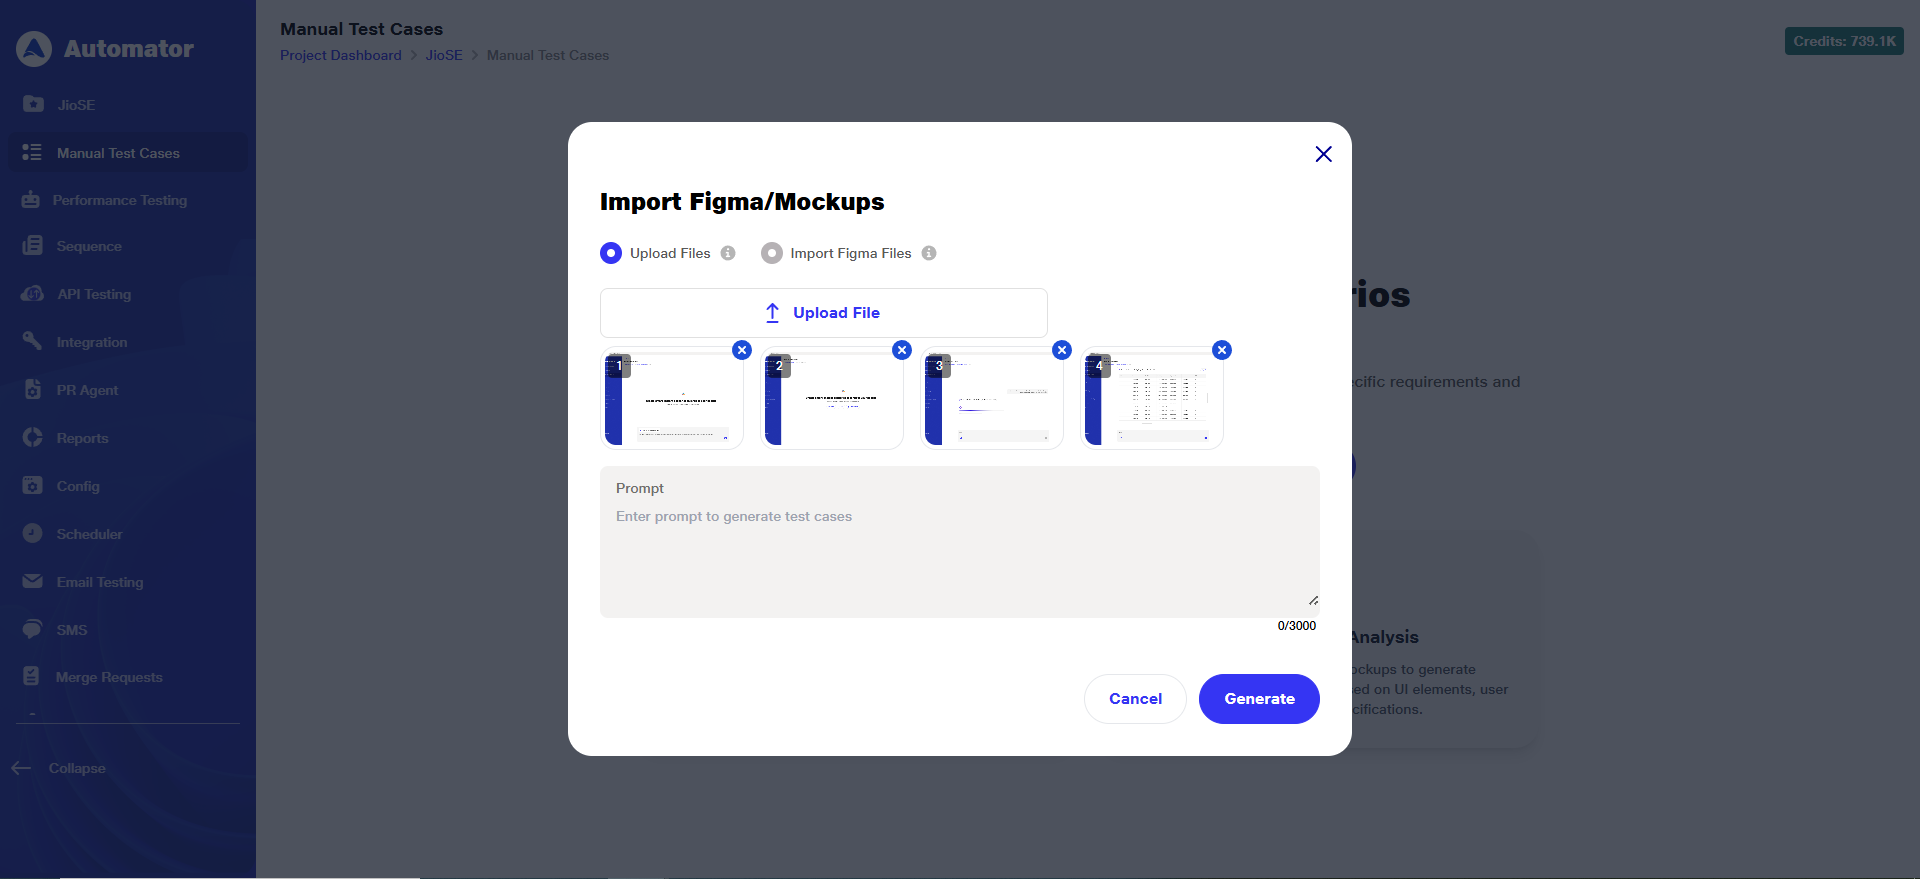
4) Steps to Execute Import Figma/Mockups
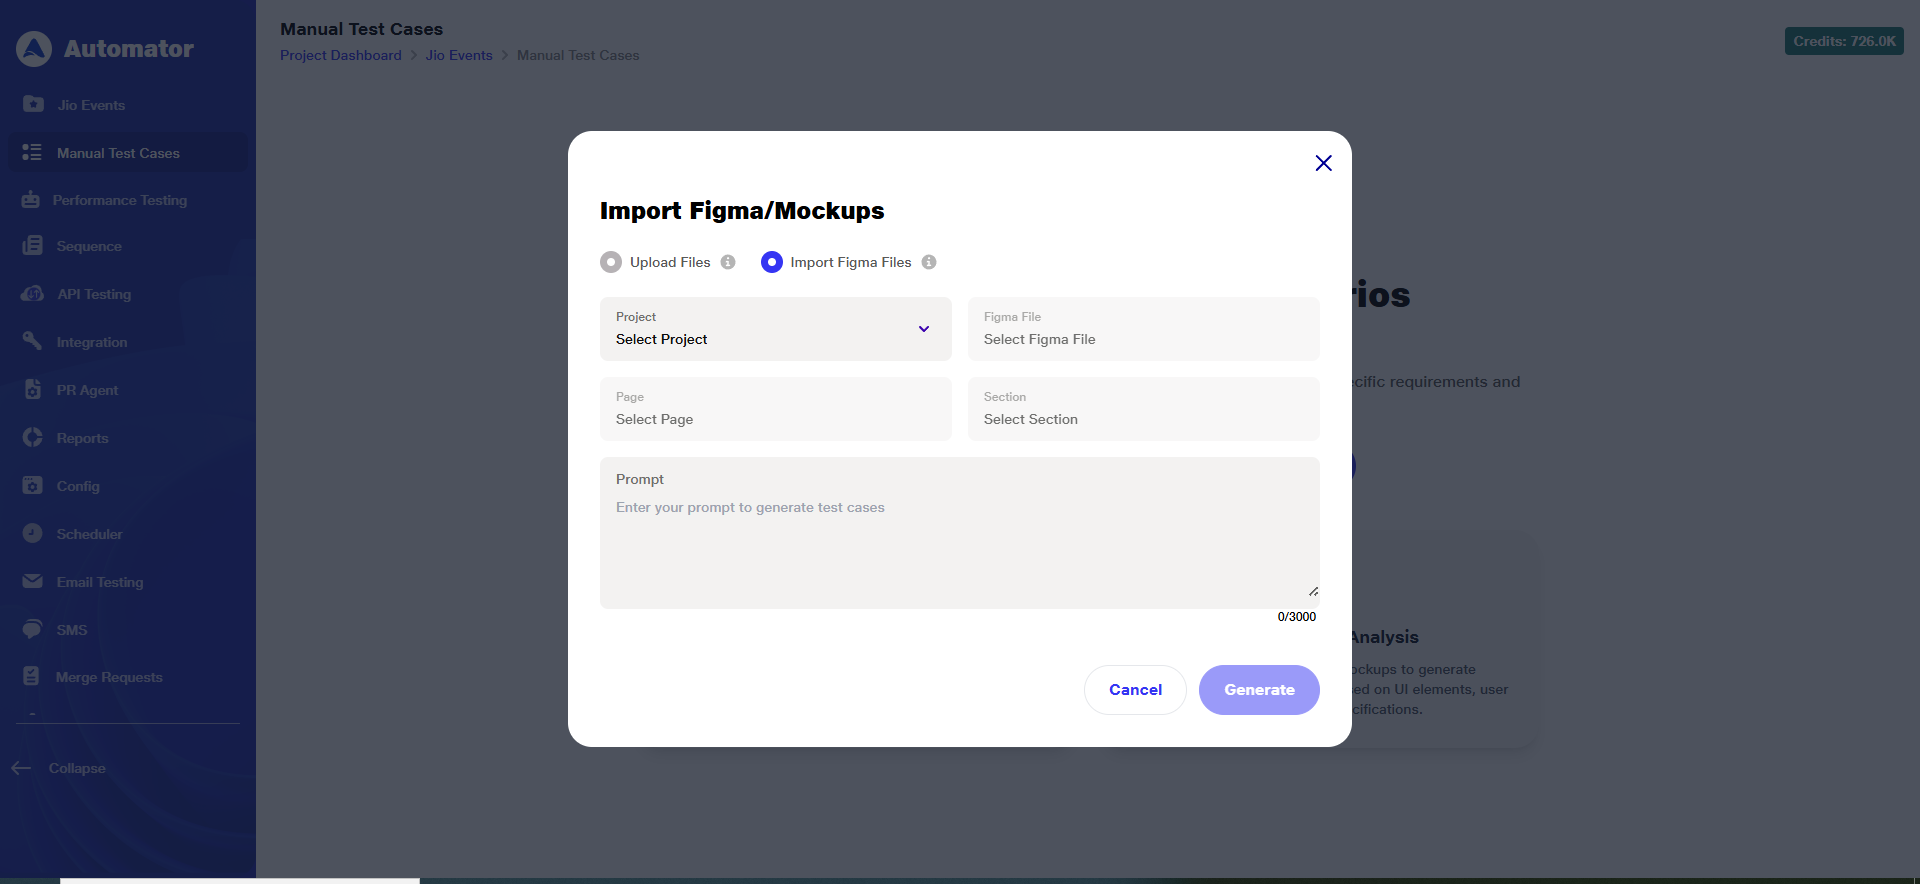
a. To get started with requirements-based manual scenario generation, click on 'Import Figma/ Mockups'.
 b. Clicking above mentioned button will open an input panel where you can either:
i) Upload an image containing your design using the Upload File option. The image size must be between 1 KB to 100 MB, and supported file type must be .jpeg, .jpg, .png only or
ii)Select the Import Figma Files (radio button) option to import designs directly from your Figma account.
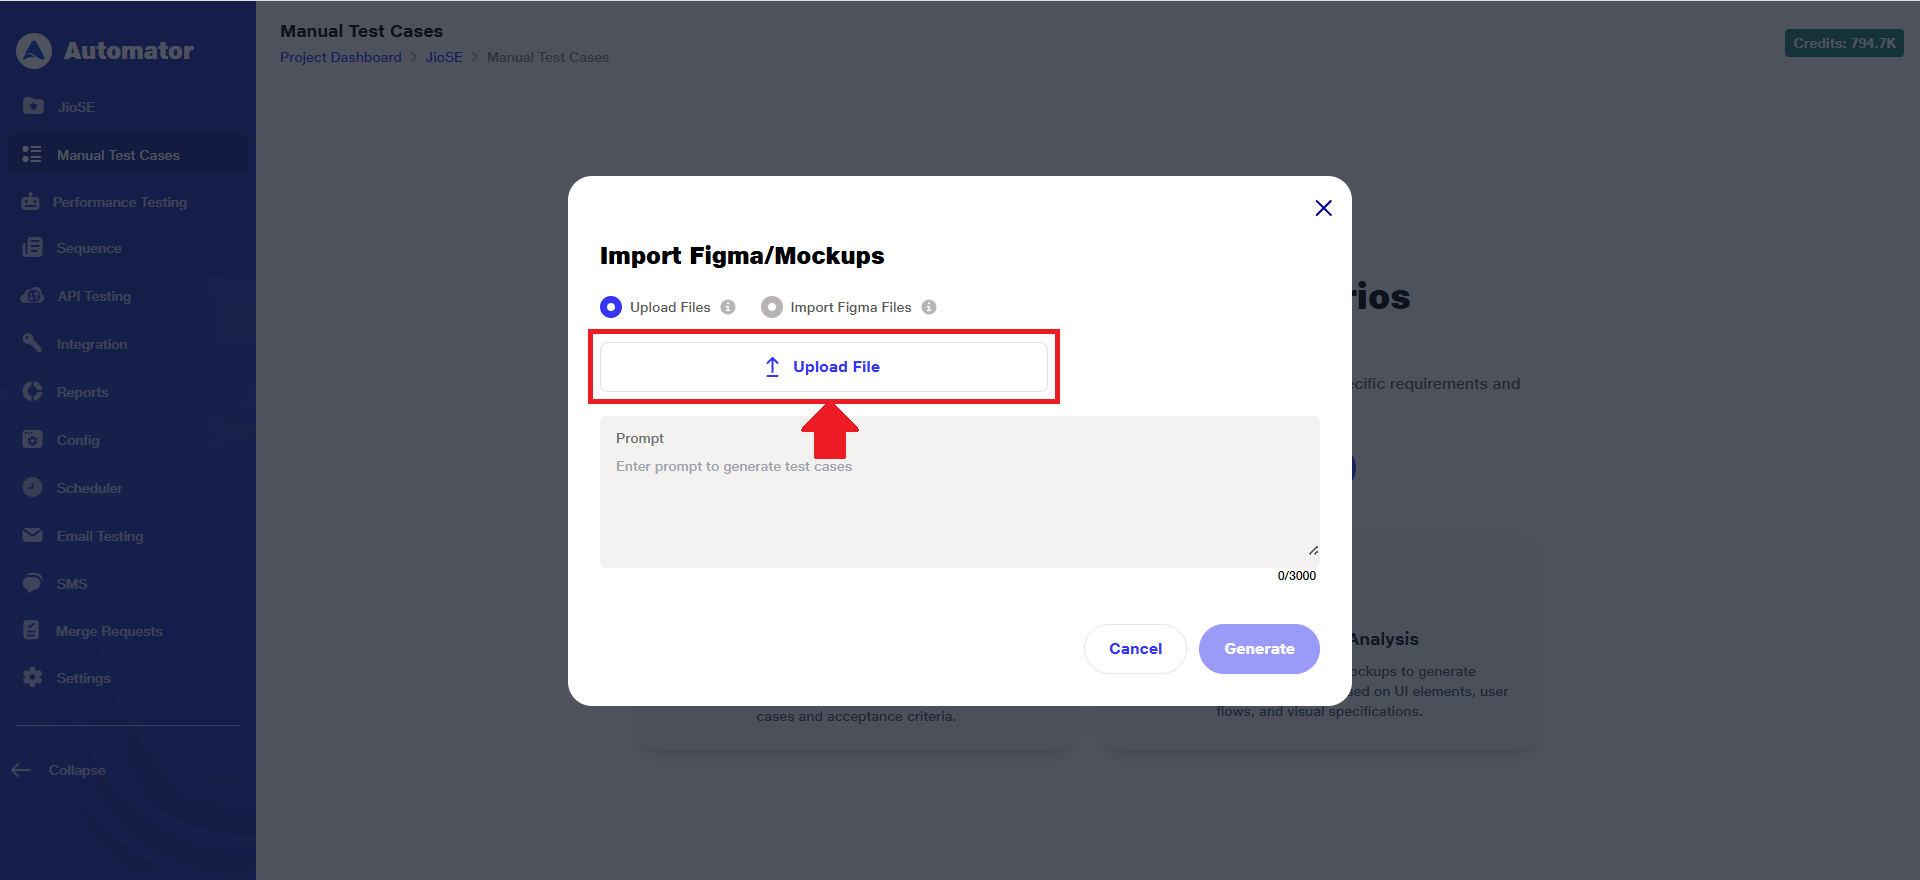
A) Upload Design File
1) To continue with the Upload Design File, click on the Upload File button.
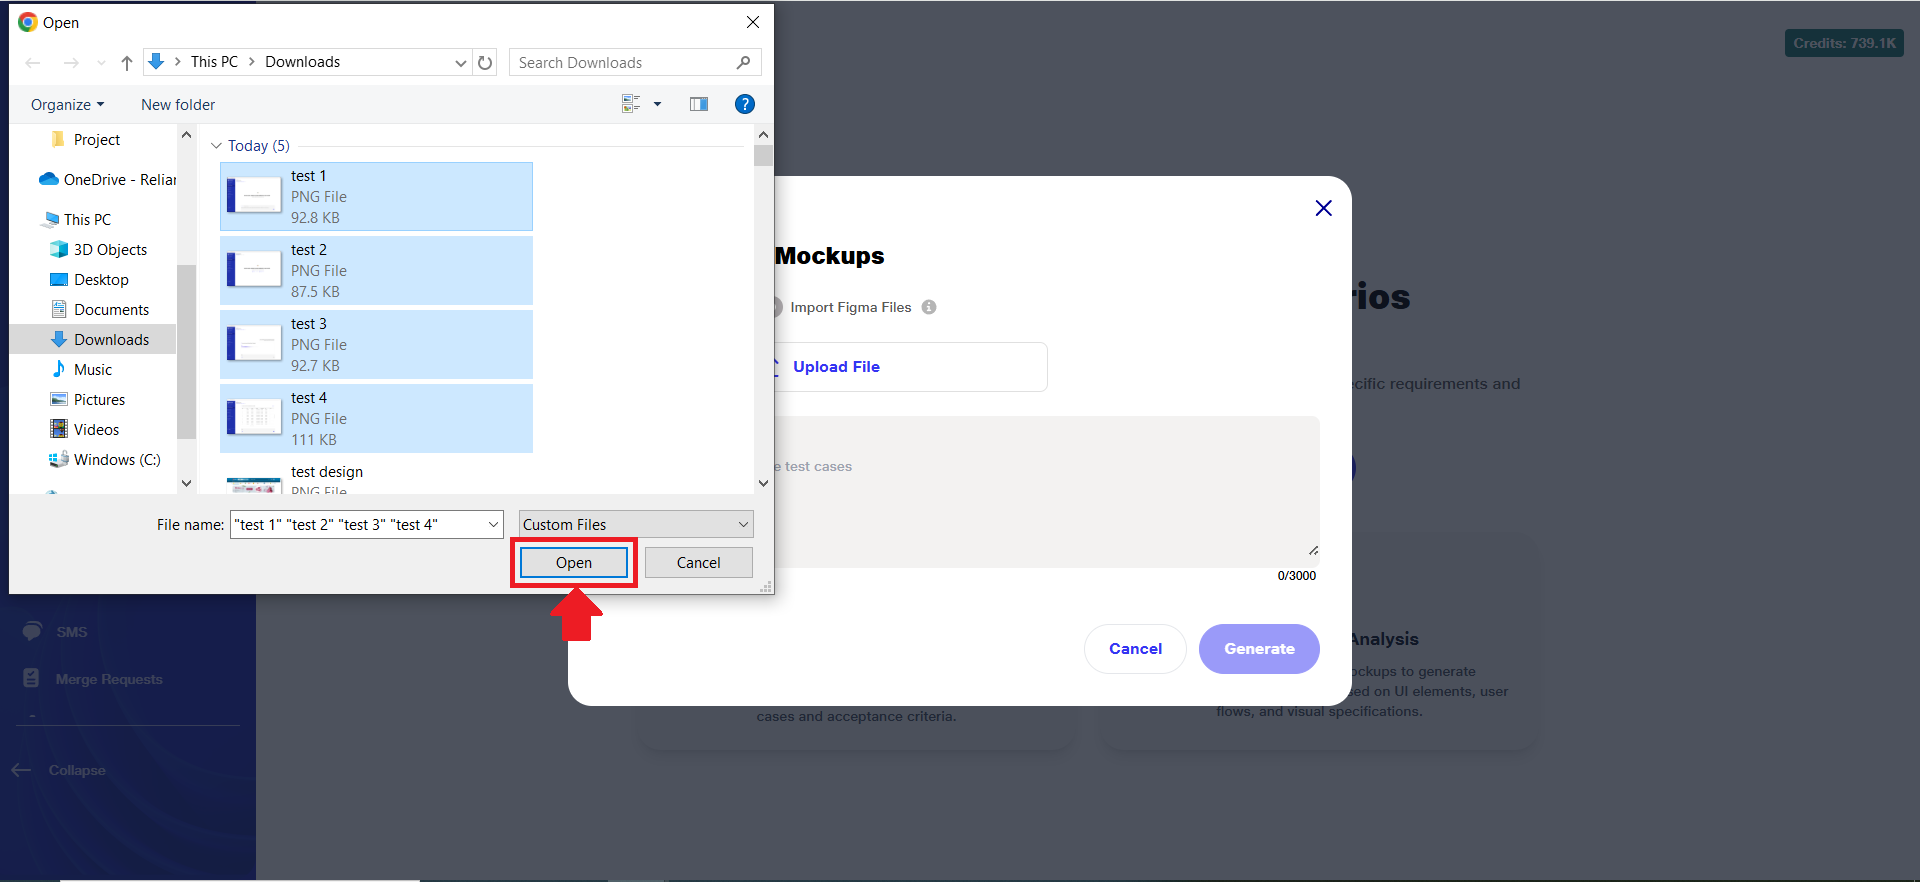
 2) Browse and choose the document containing your requirements.
3) Upload one or more images that meet the specified size and format requirements. The supported file size range is 1 KB to 100 MB, and the supported file type must be .jpeg, .jpg, .png only.
4) Once selected, click 'Open' to upload the file for AI-powered test scenario generation.
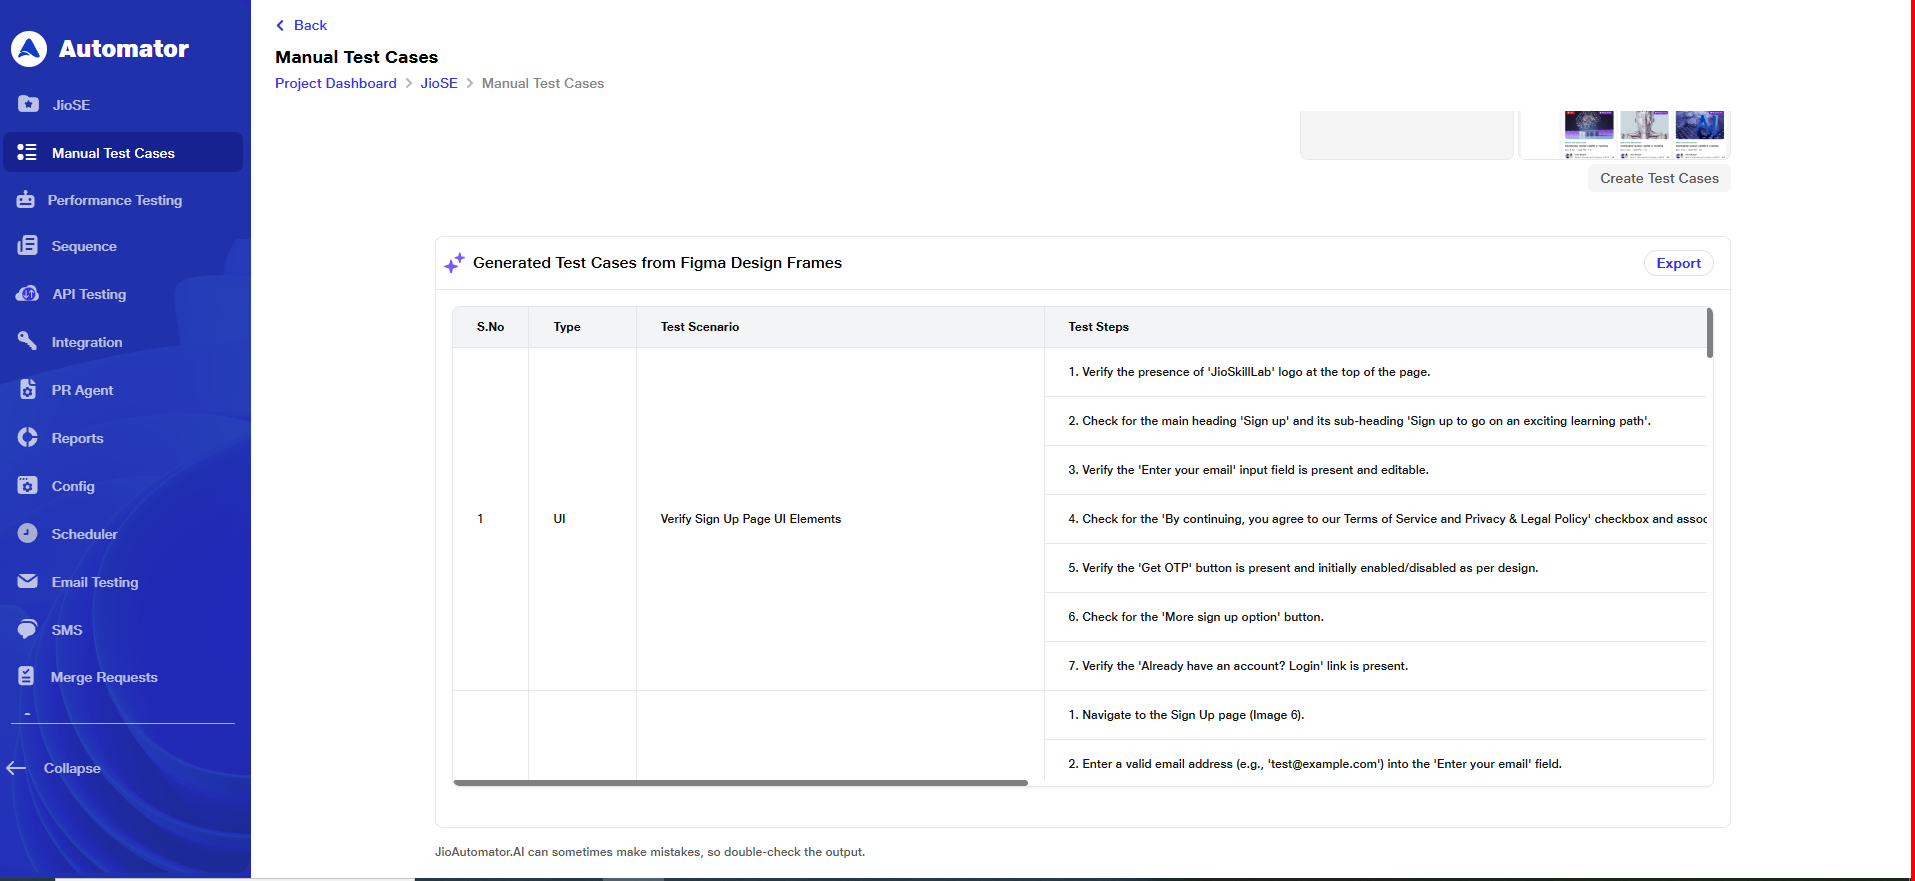
 5) Once the design is uploaded, a design appears as shown below:
 6) The Generate button becomes active on uploading an image file.
7) You can enter a custom prompt to guide the AI in tailoring the test scenarios.
8) After that, click Generate to initiate the scenario creation process.
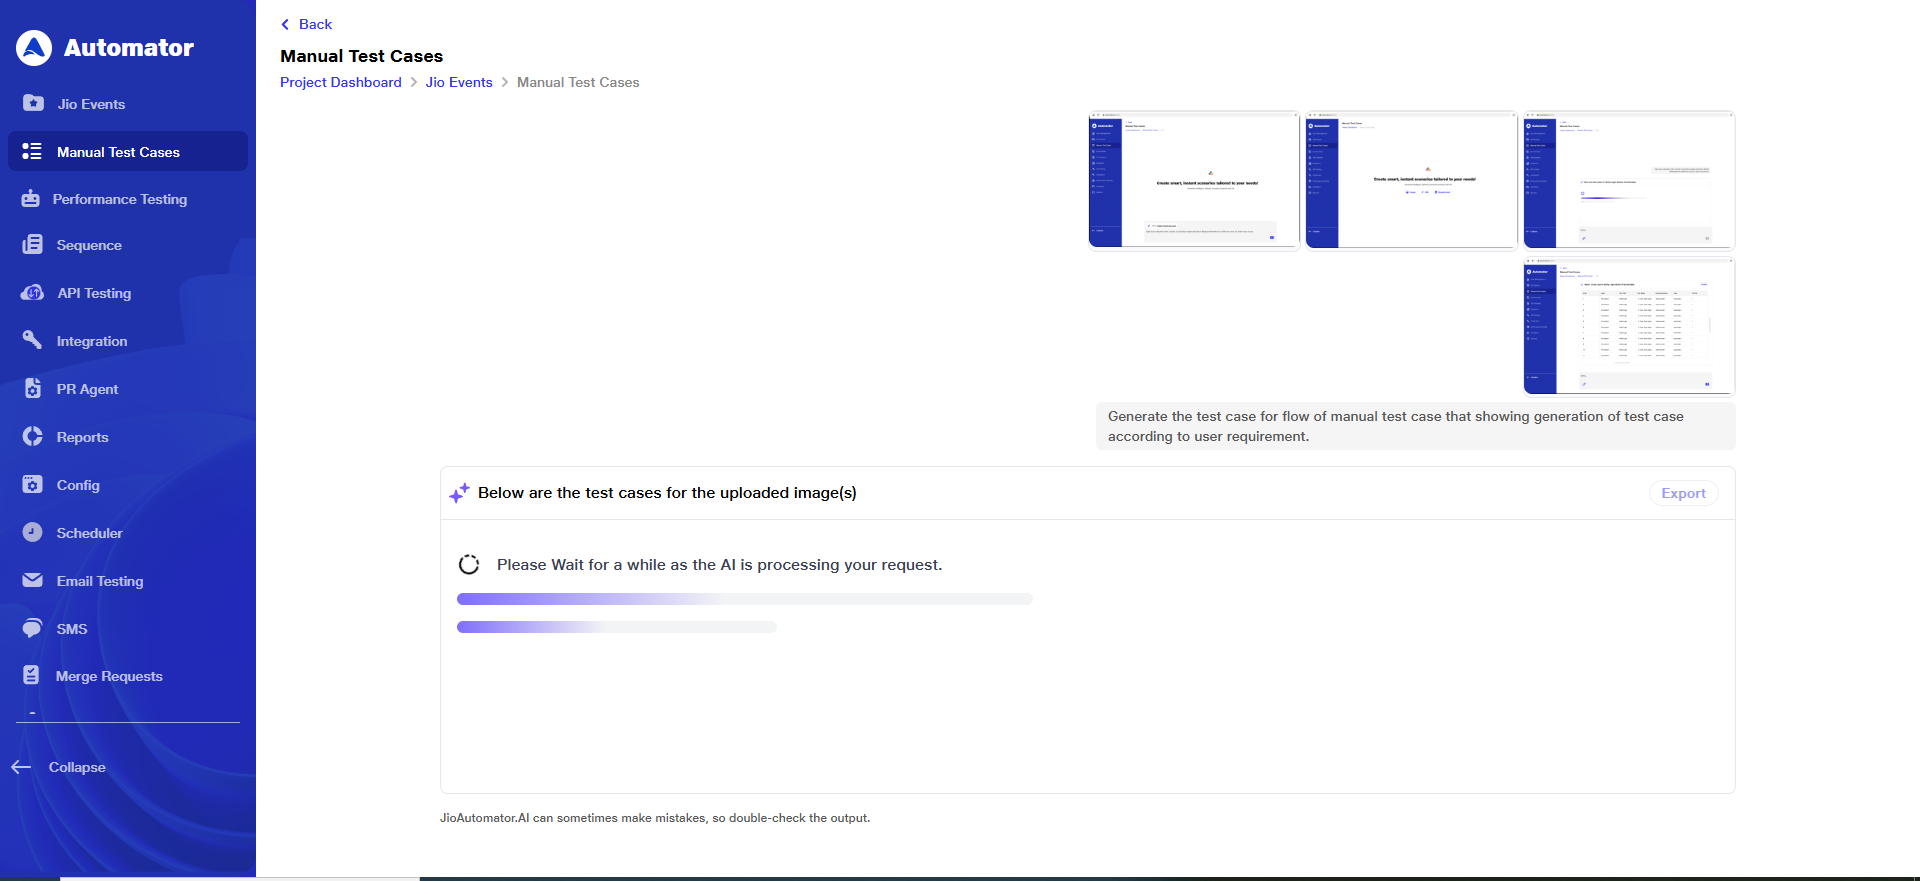
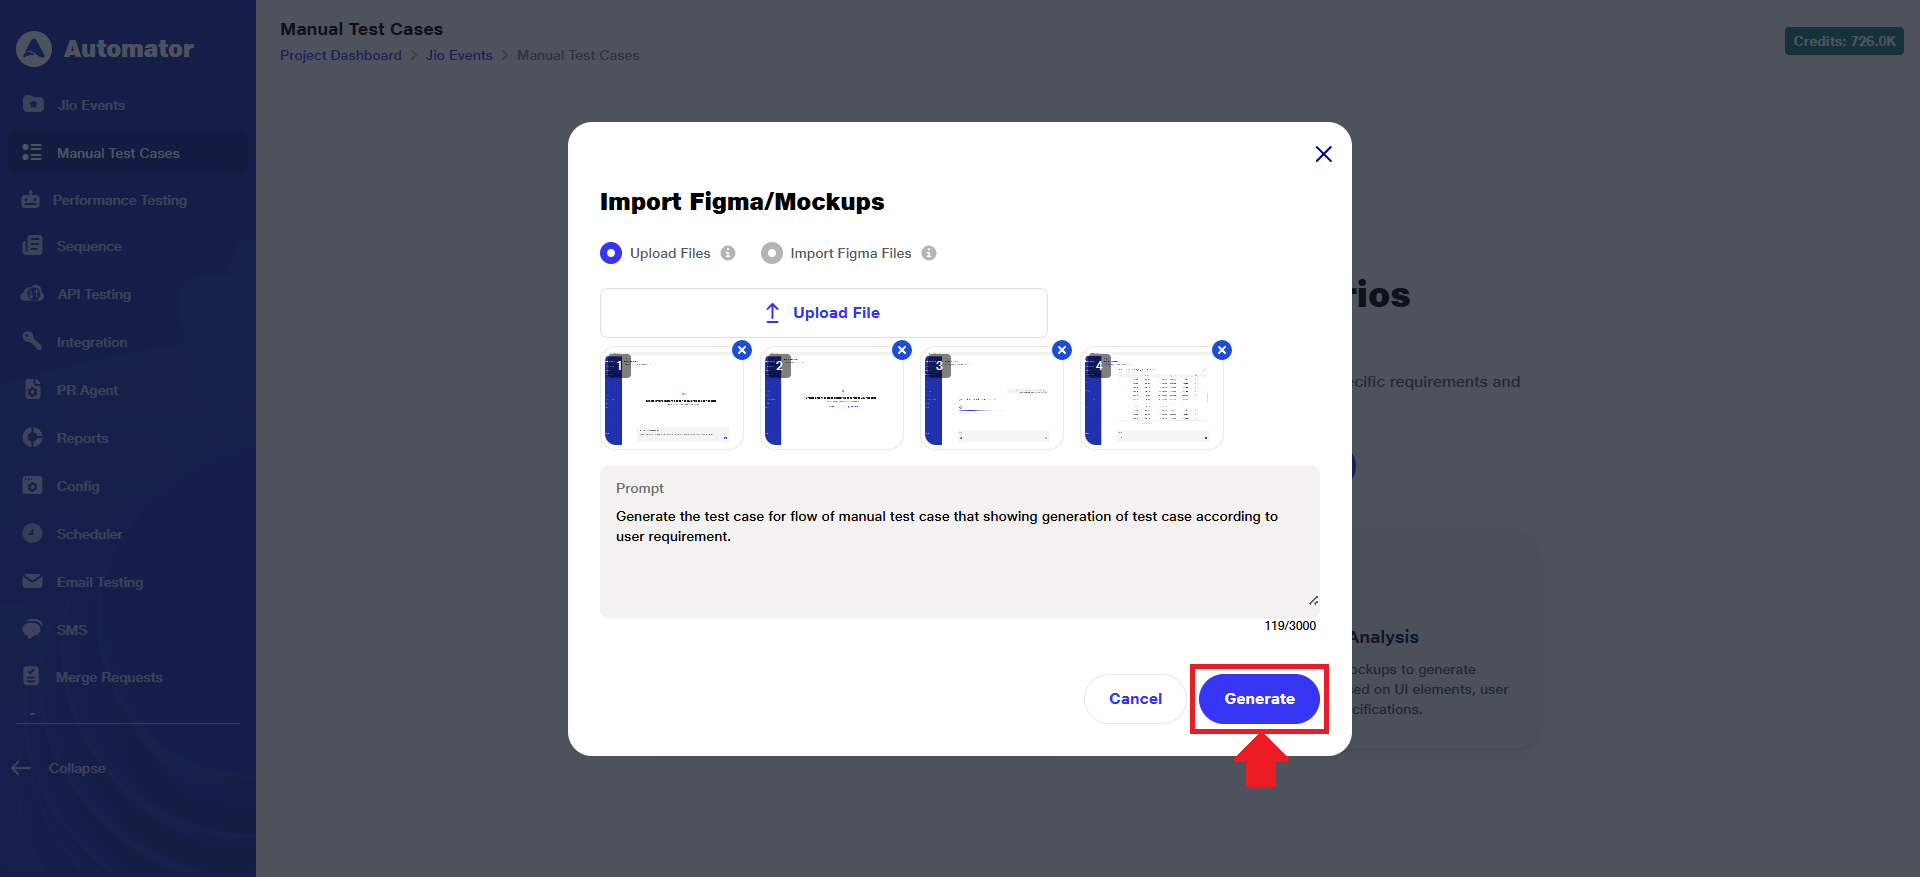 9) It may take some time to load the test scenarios.
 10) Once the data is loaded, the list of test scenarios with their corresponding test steps will be displayed on the screen.
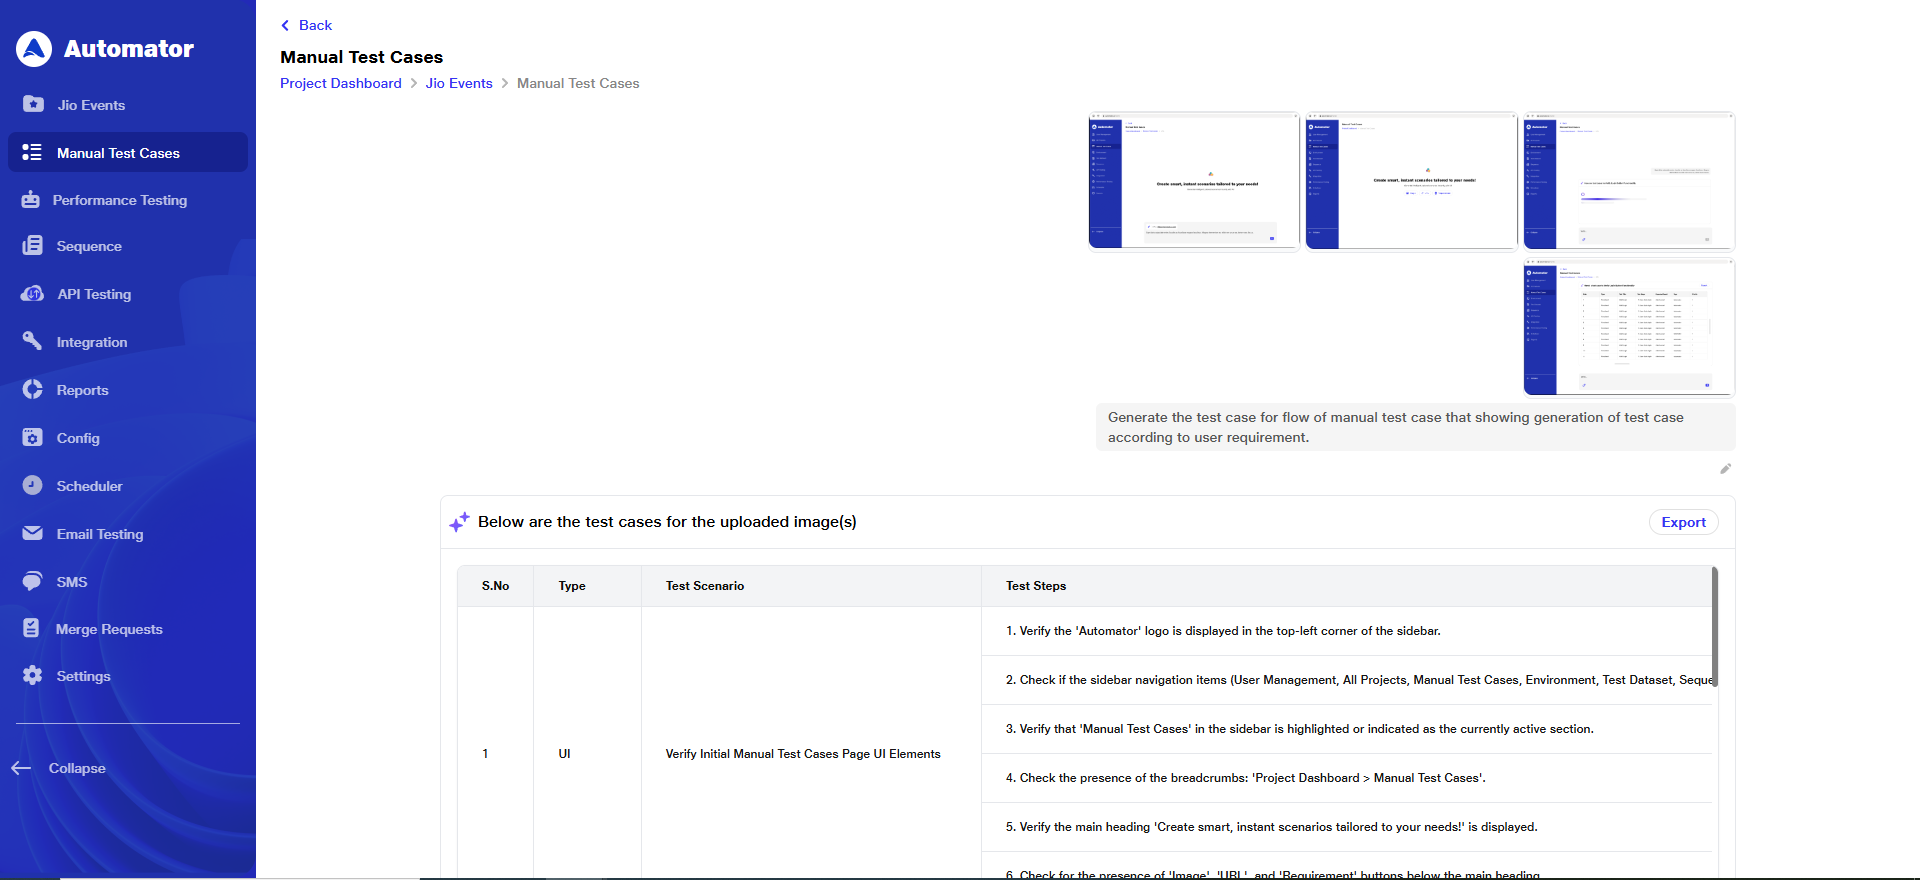 11) To edit or export, please refer to points 5 and 6.
B) Import Figma Files
1) Select the Import Figma Files option by clicking on the corresponding radio button.
2) Note: If you haven’t connected your Figma account yet:
i) Click the Connect Now button to integrate your Figma account.
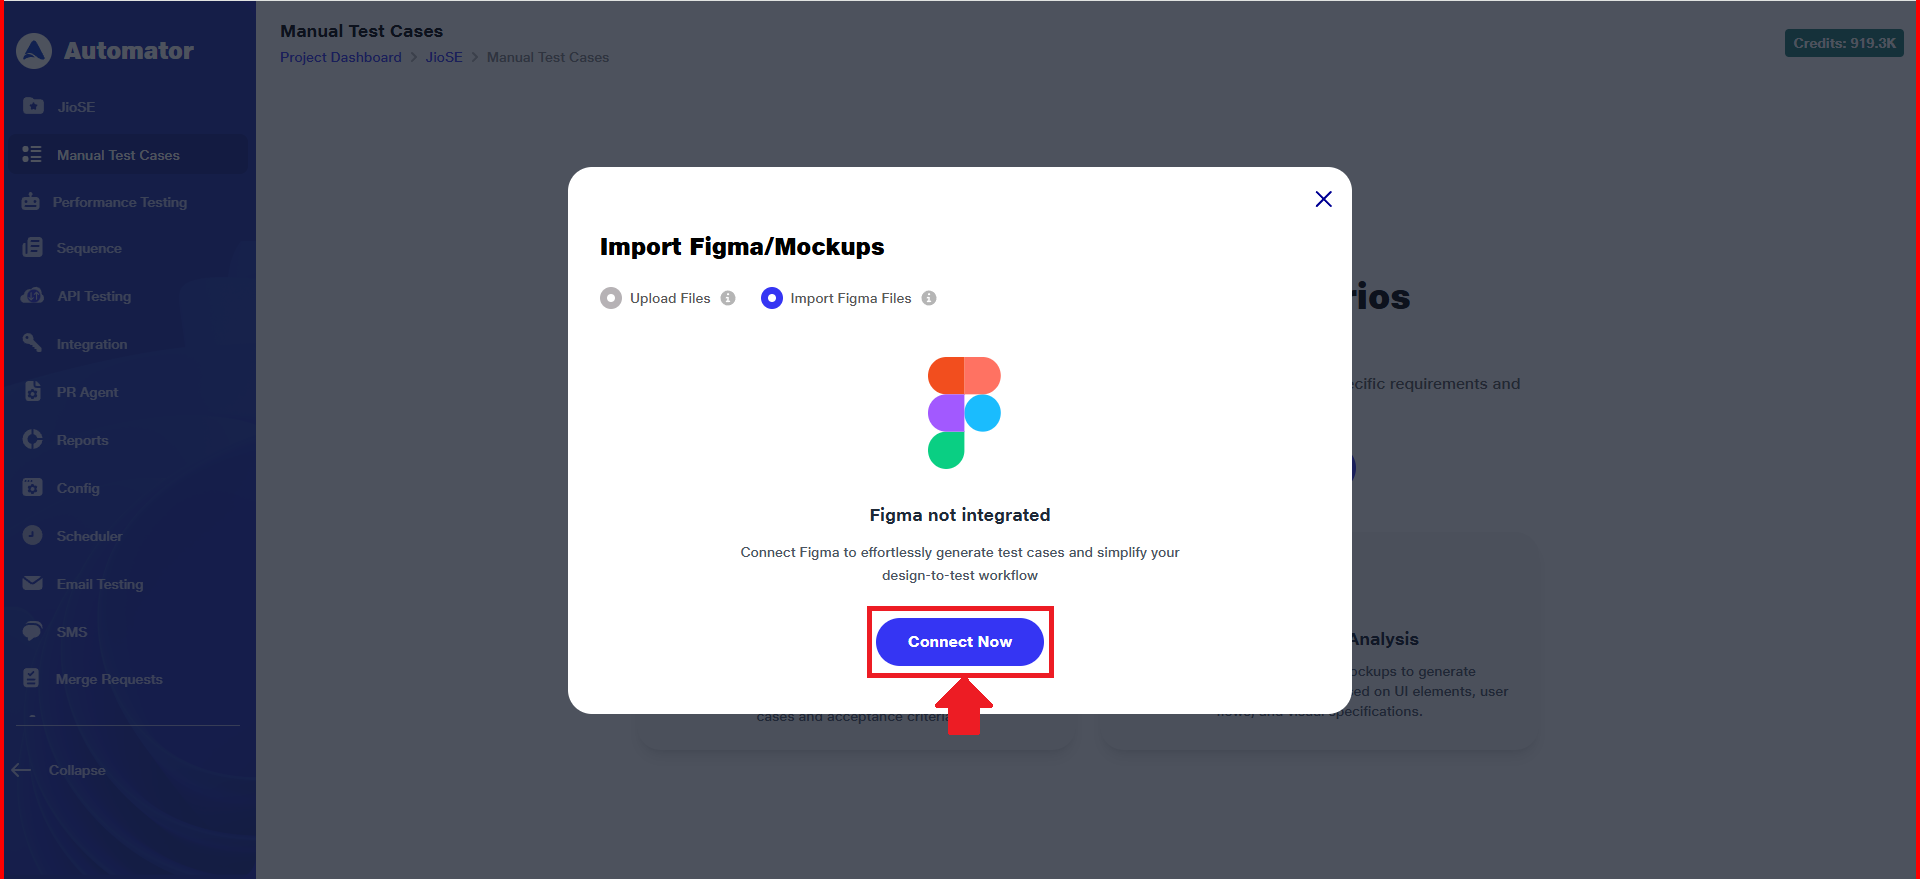 ii)You will be redirected to the Third-Party Integration section from Settings, where you need to click on the Connect button within the Figma option to proceed.
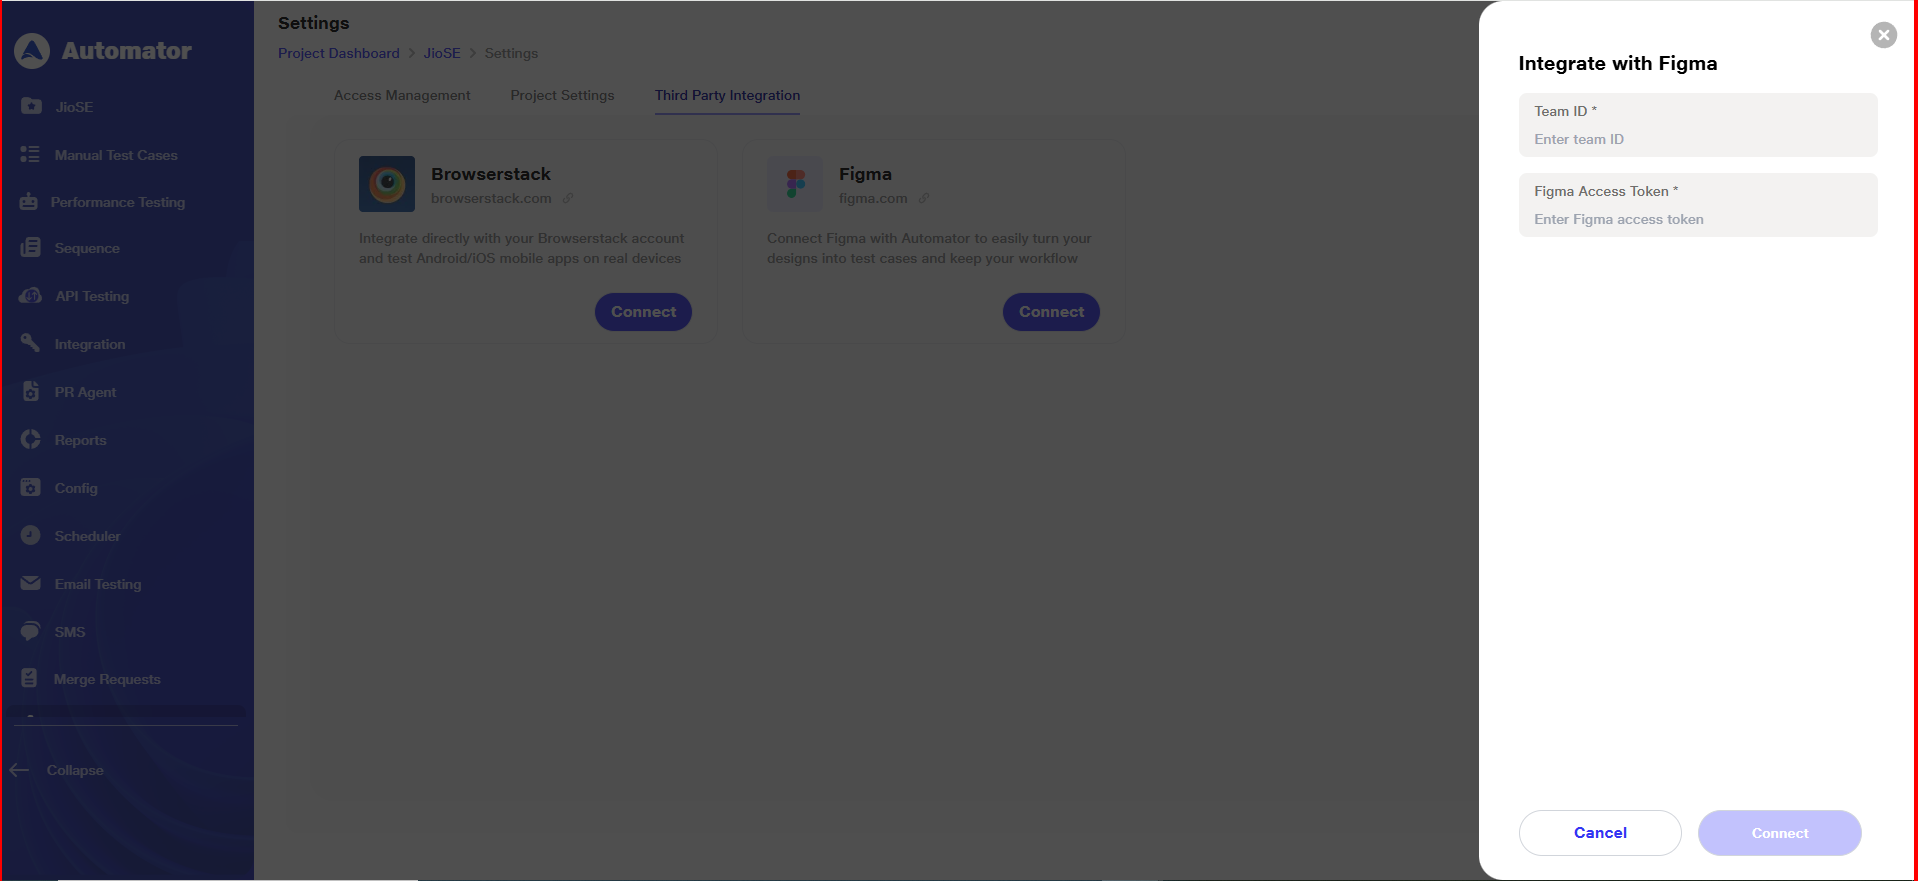
 iii) After clicking Connect, the Figma integration panel opens. Enter your Team ID and Figma Access Token to link your Figma account.
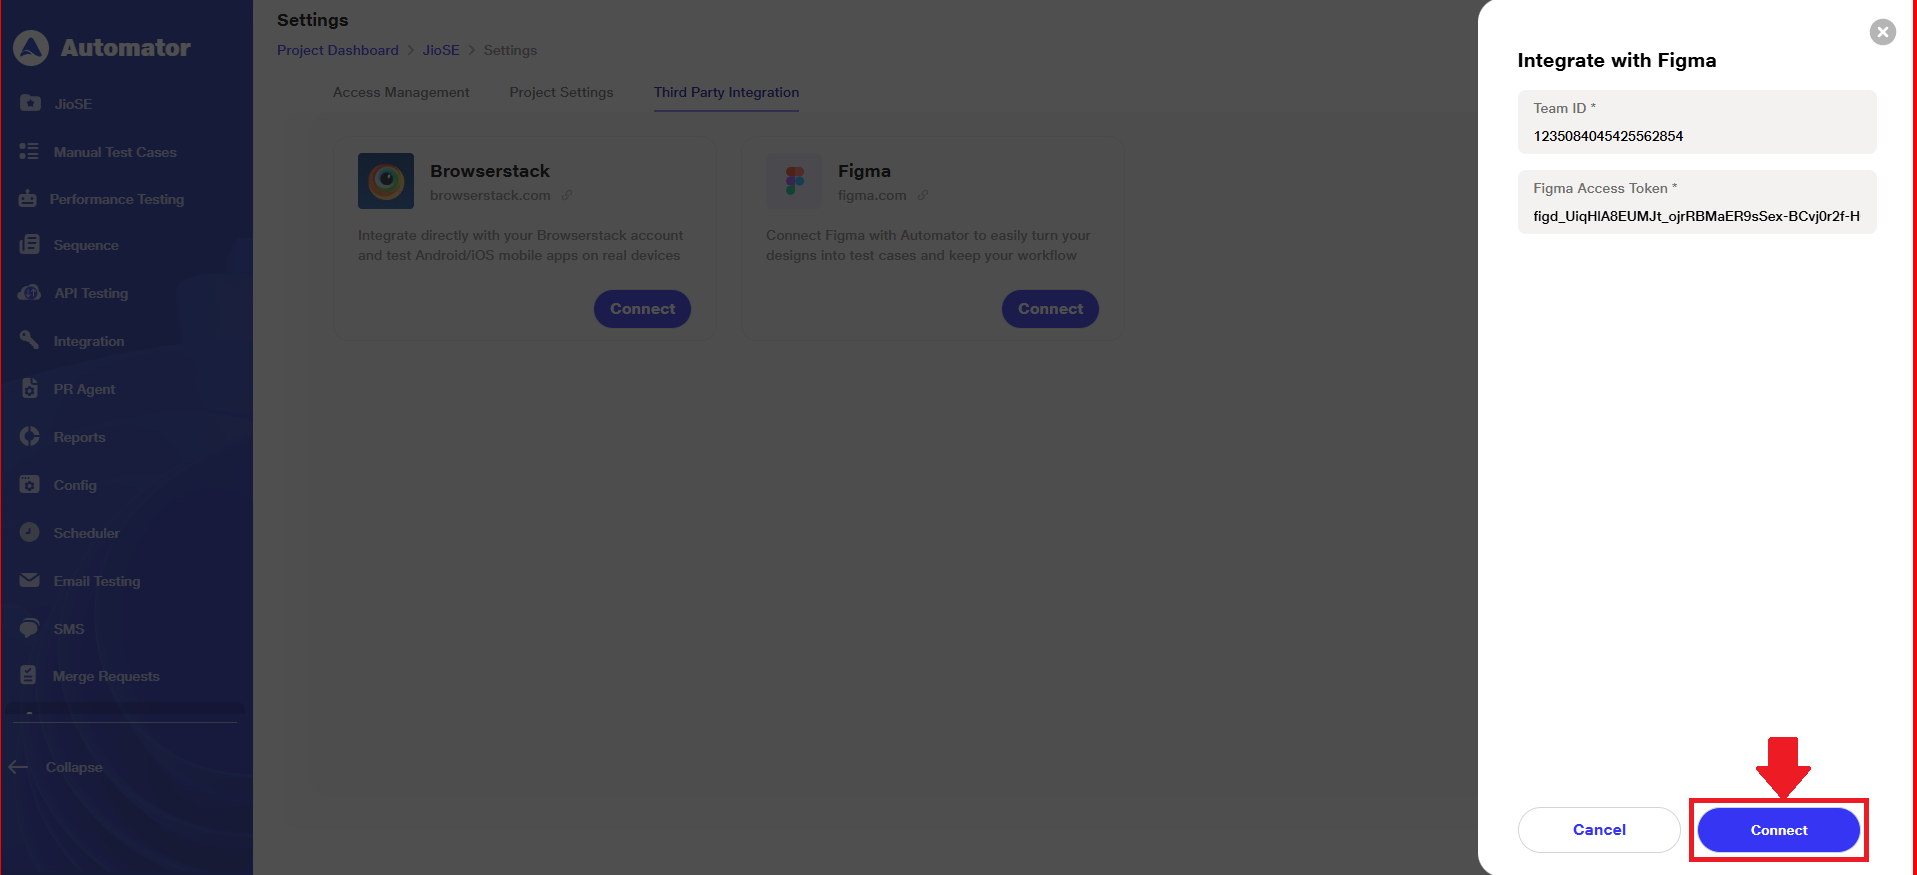
 iv) After entering both required fields, click Connect to proceed.
 v) On successful connection, a Figma integrated successfully! confirmation popup appears at the bottom-left corner.
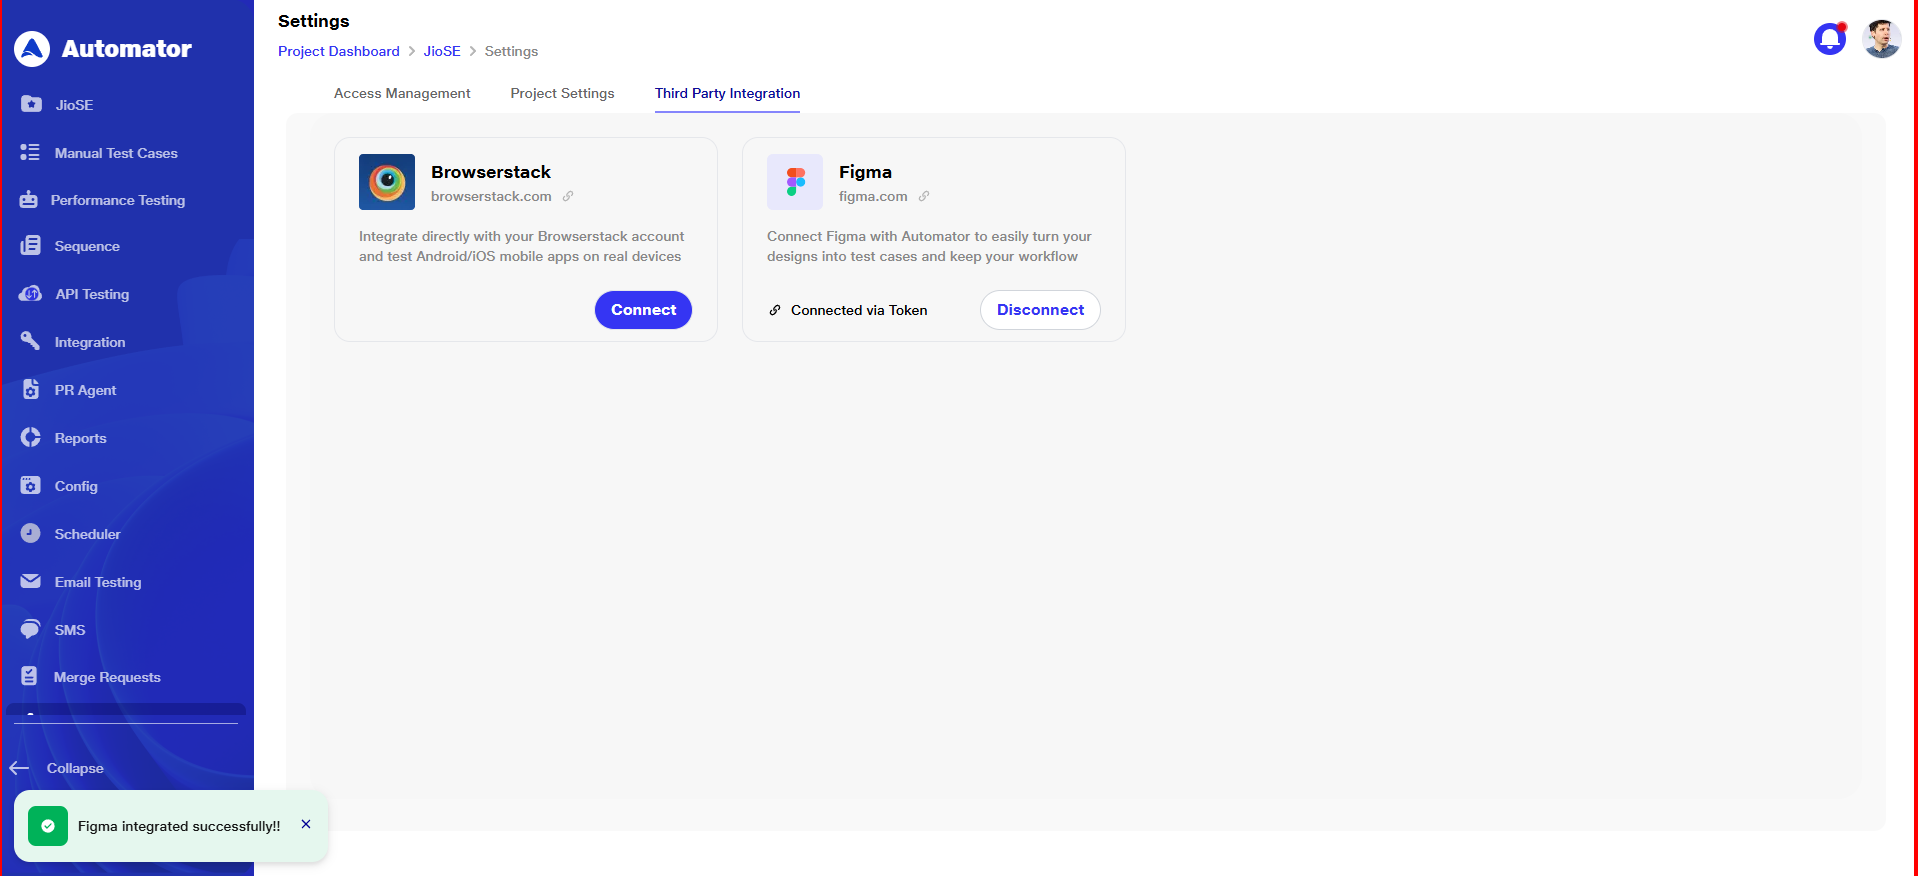 vi)The Connect button within the Figma option changes to a Disconnect button, allowing you to click and stop using the Figma integration.
vii) Returning to the Import Figma Files page, your Figma account is now connected, and the Select Project option is available for selecting a Figma file.
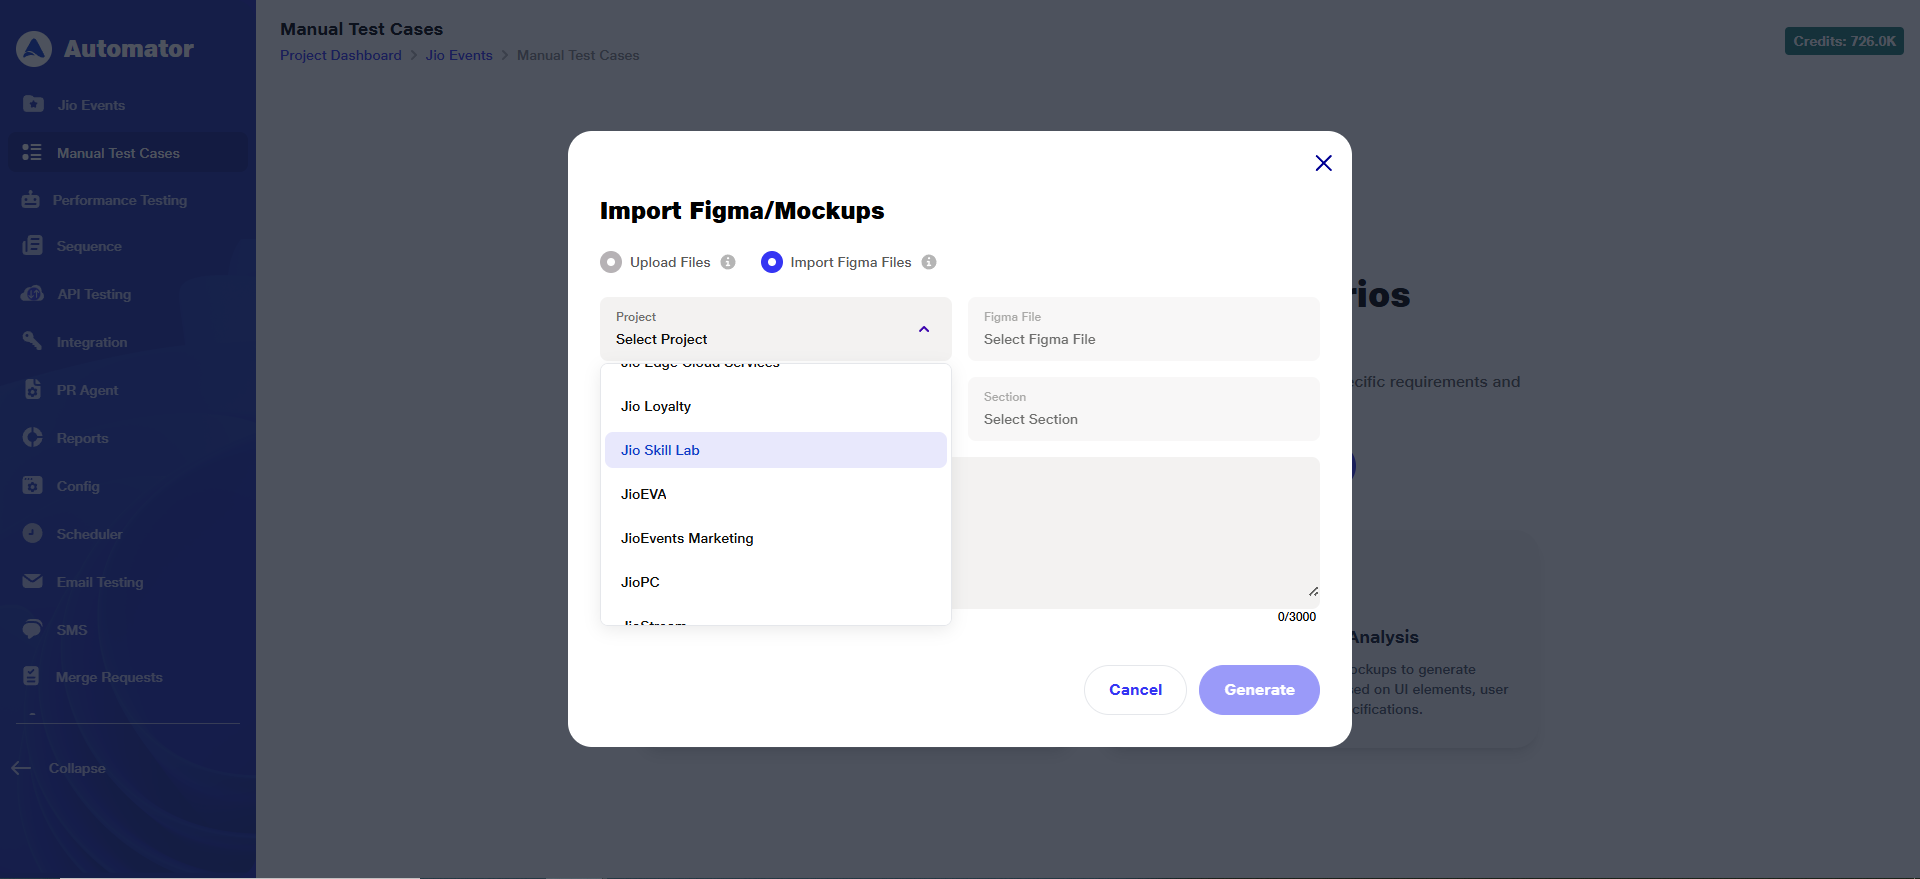
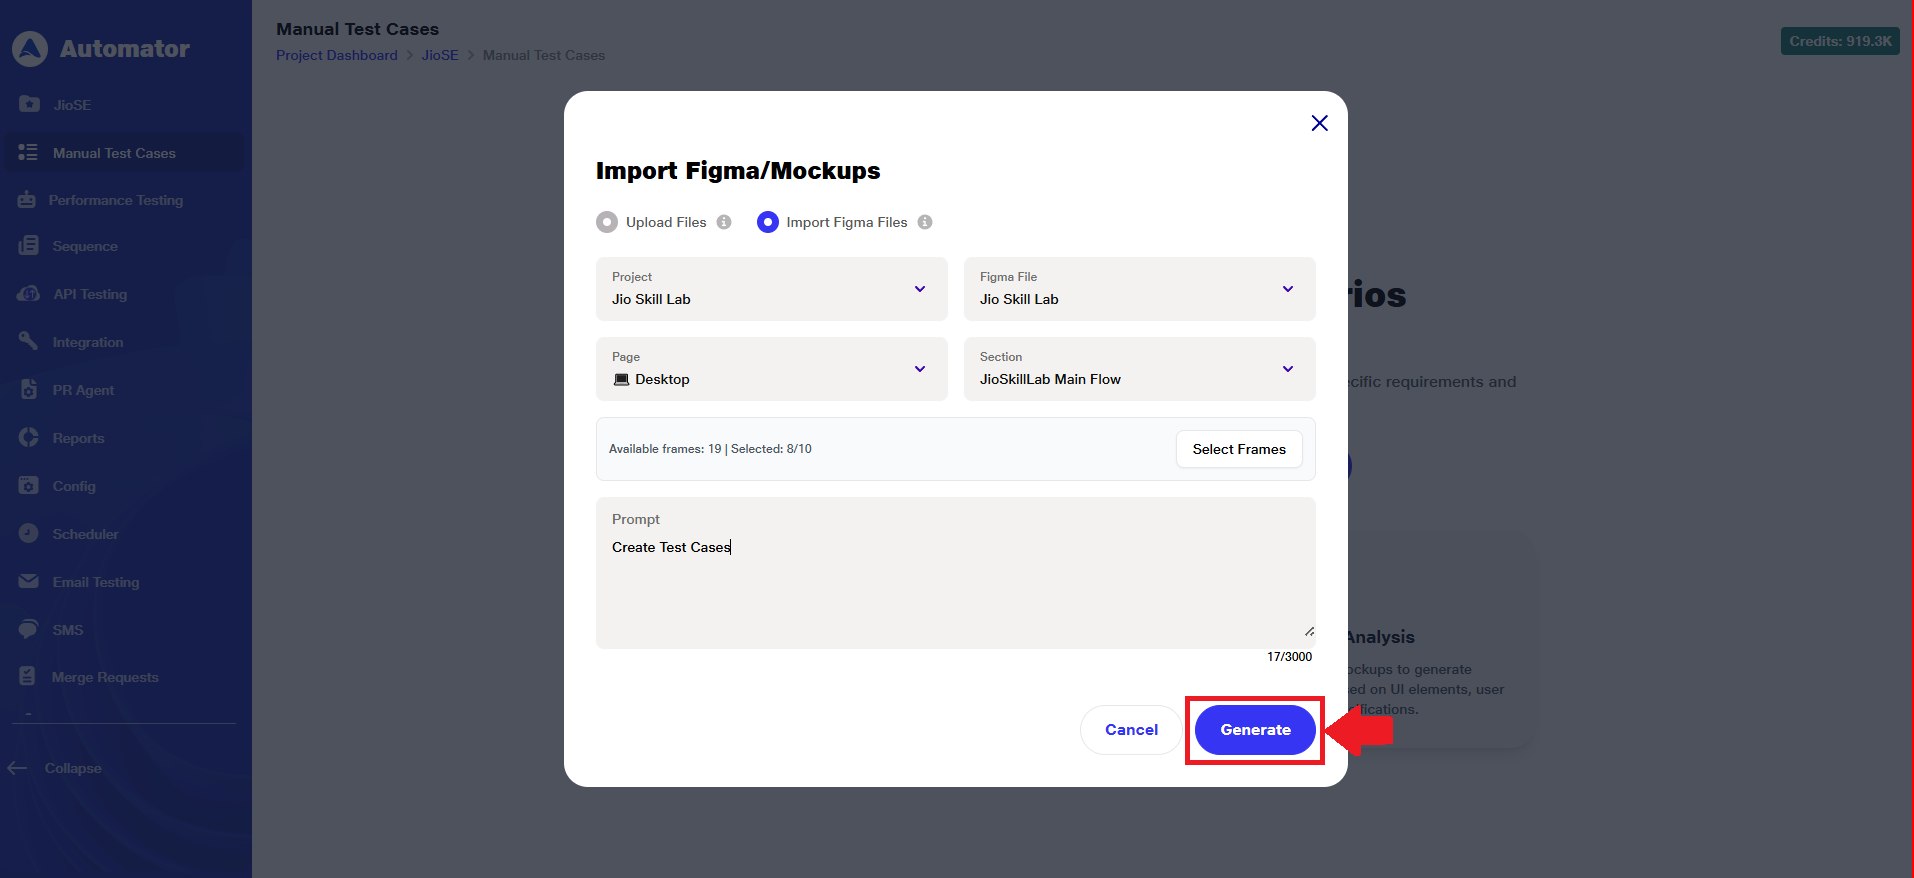
 3) Click on the Project dropdown and select the required project linked to your connected Figma account.
 4) Complete the remaining entries by selecting values from the dropdowns for Figma File, Page, and Section.
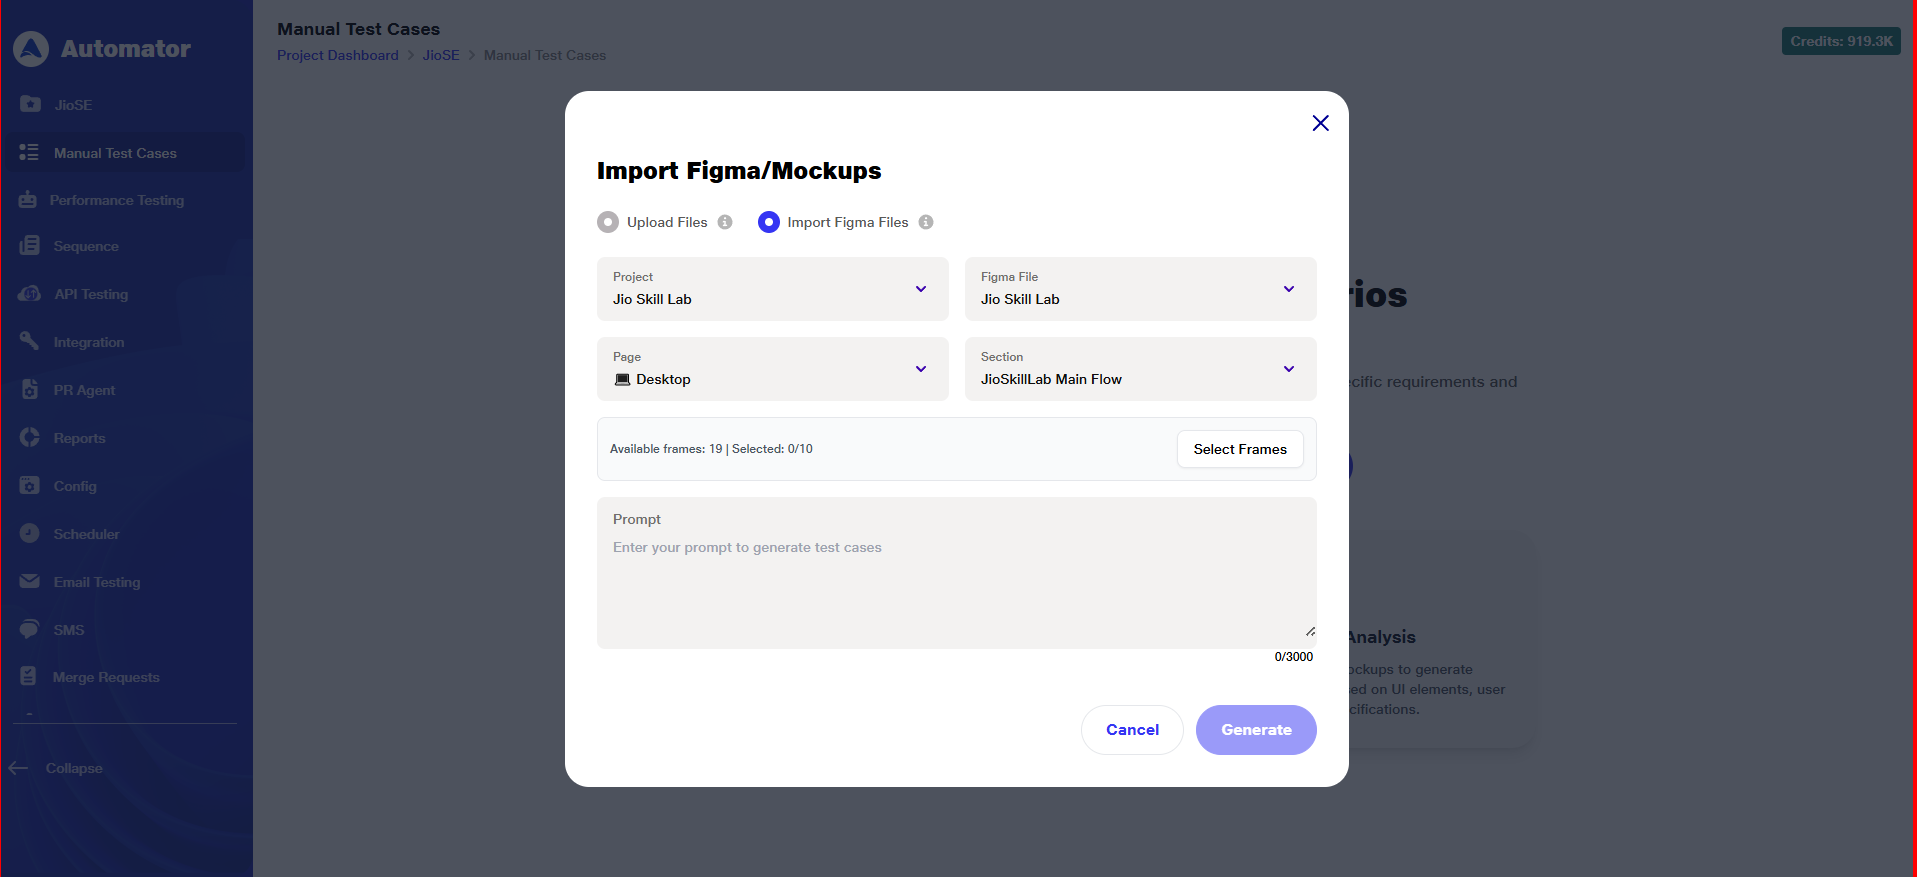 5) In the Select Frames section, the Available Frames count for the selected repository is displayed along with the Selected count (e.g., 0/10), indicating the number of frames selected.
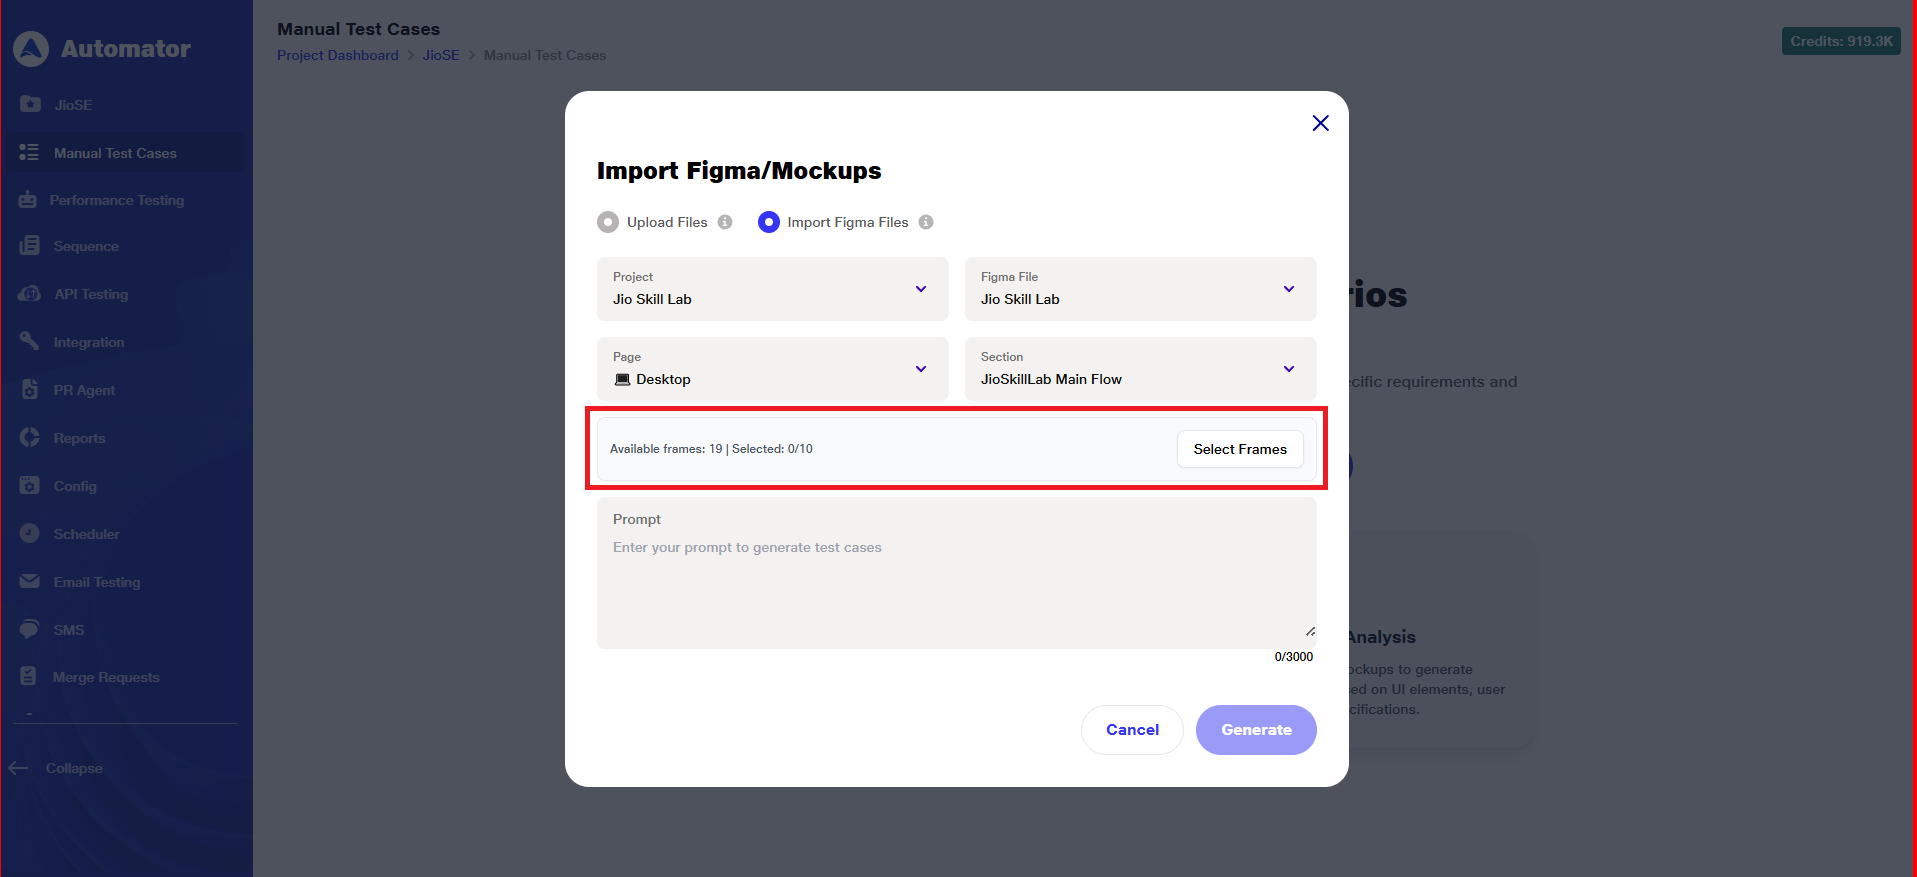 6) Click on Select Frames.
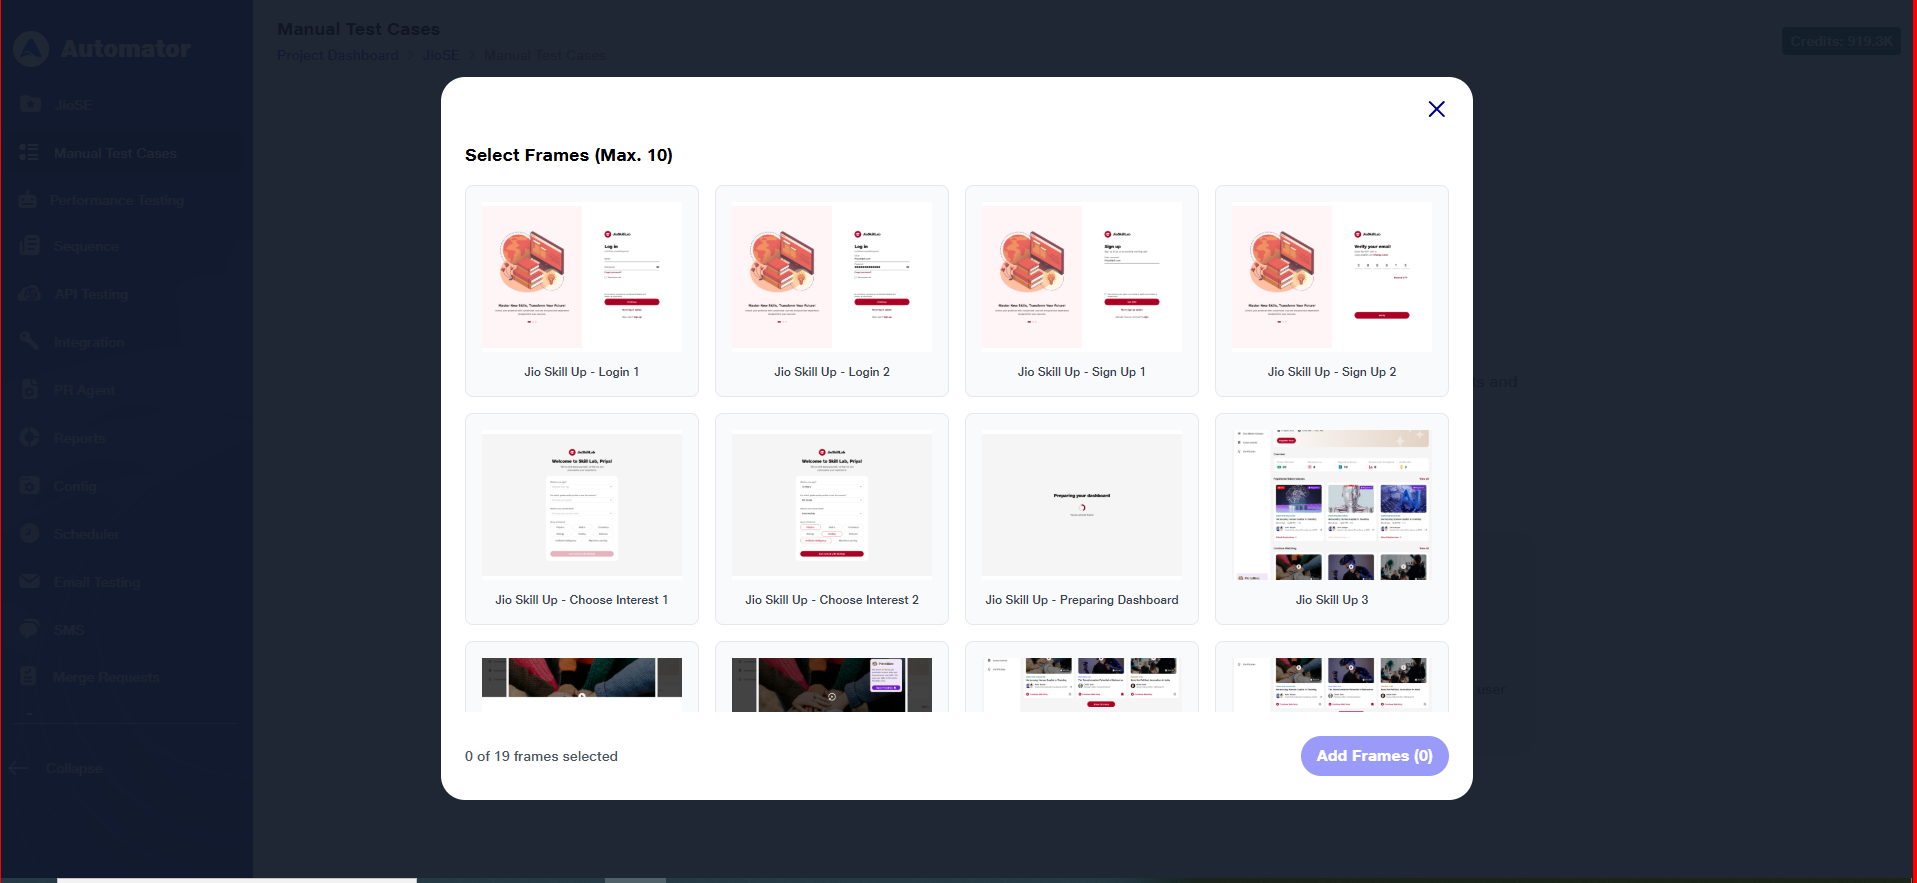 7) You can select up to a maximum of 10 frames.
 8) Click on Add Frames.
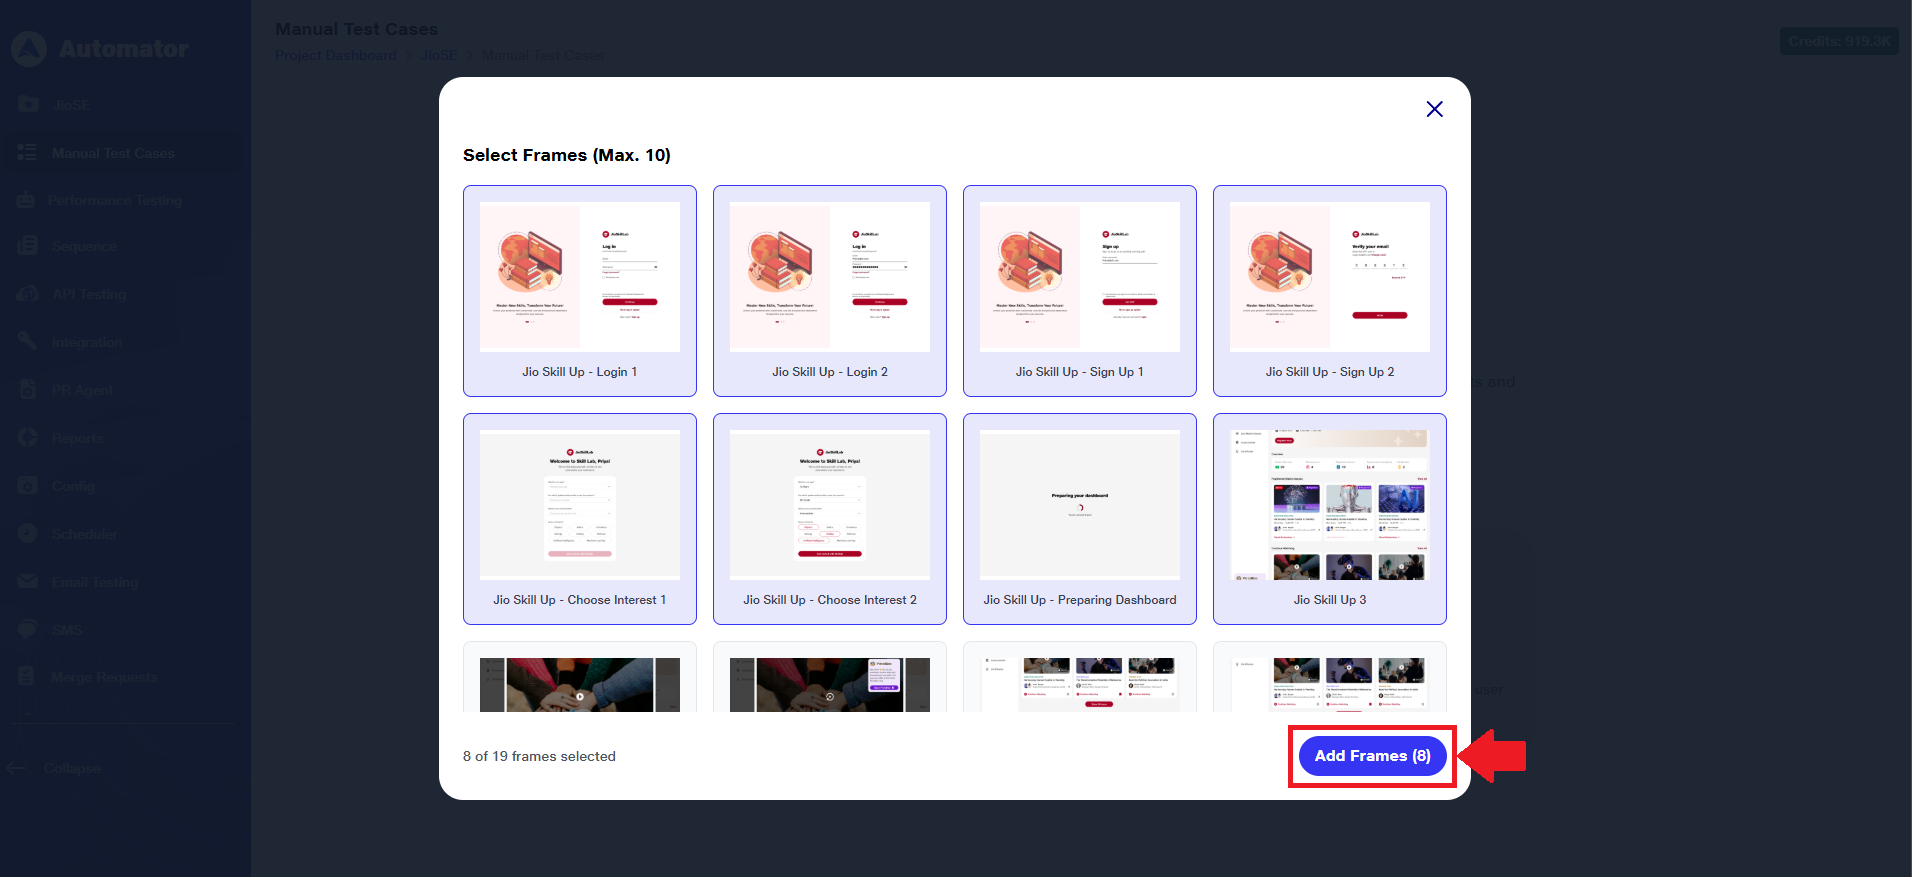 9) The Generate button becomes active on uploading frames.
10) You can optionally enter a custom prompt to guide the AI in tailoring the test scenarios.
11) After that, click Generate to initiate the scenario creation process.
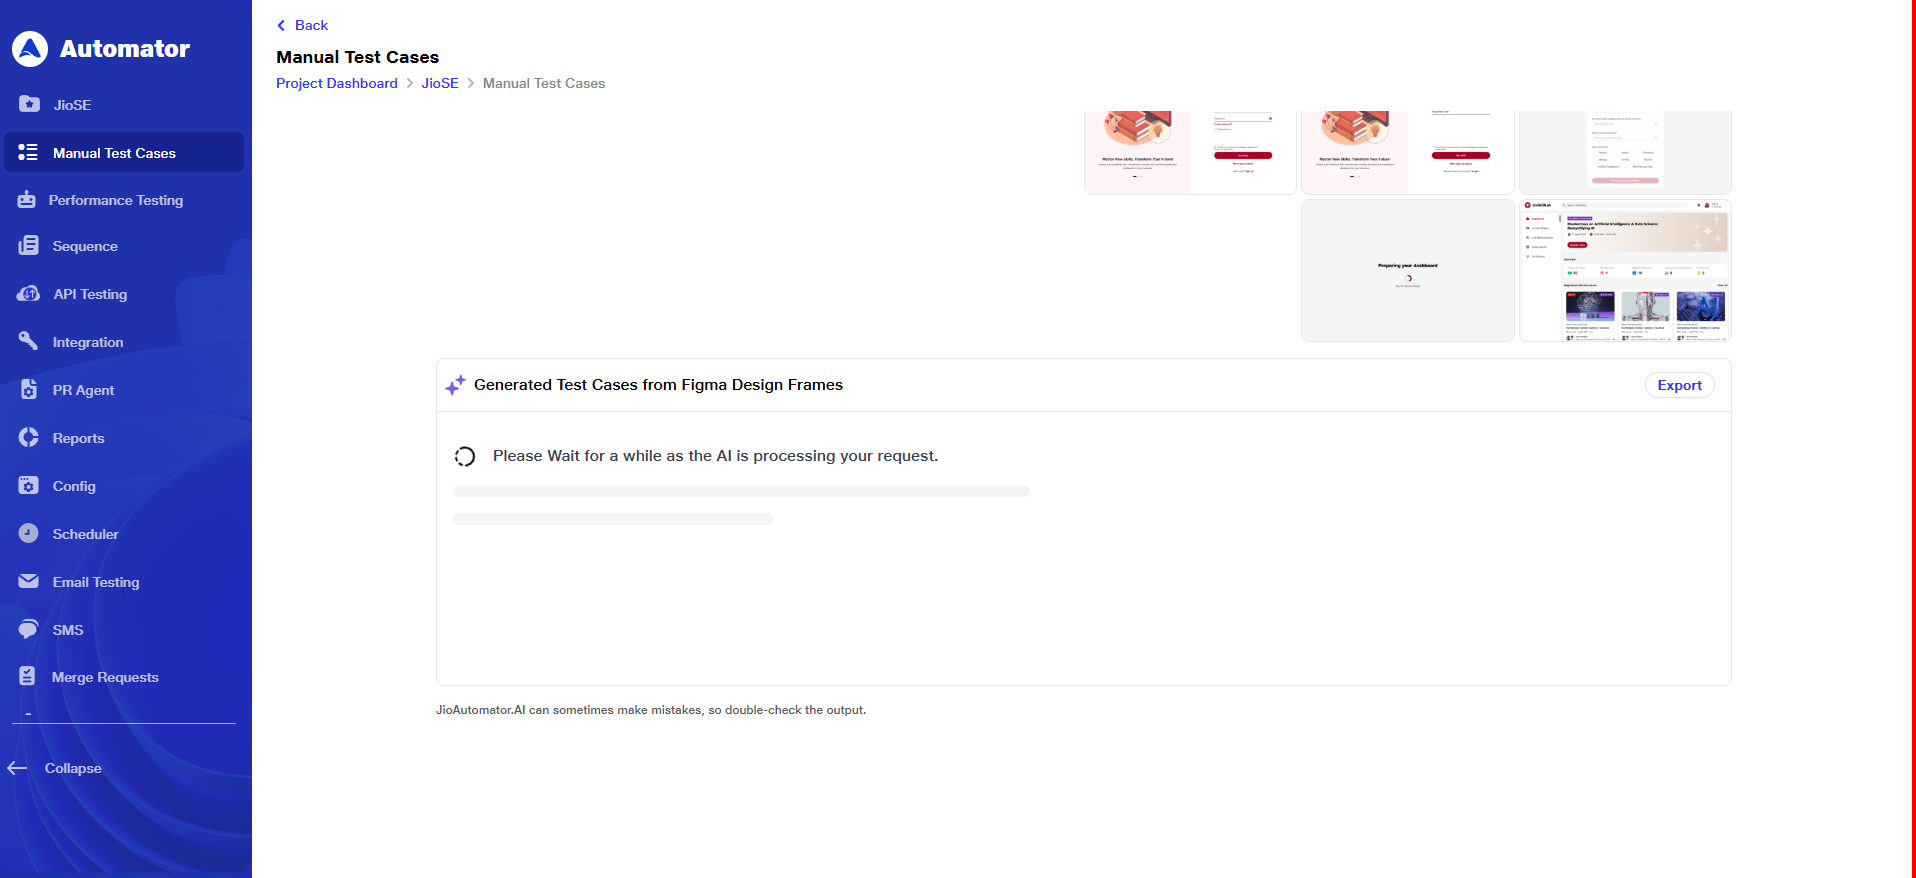
 12) It may take some time to load the test scenarios.
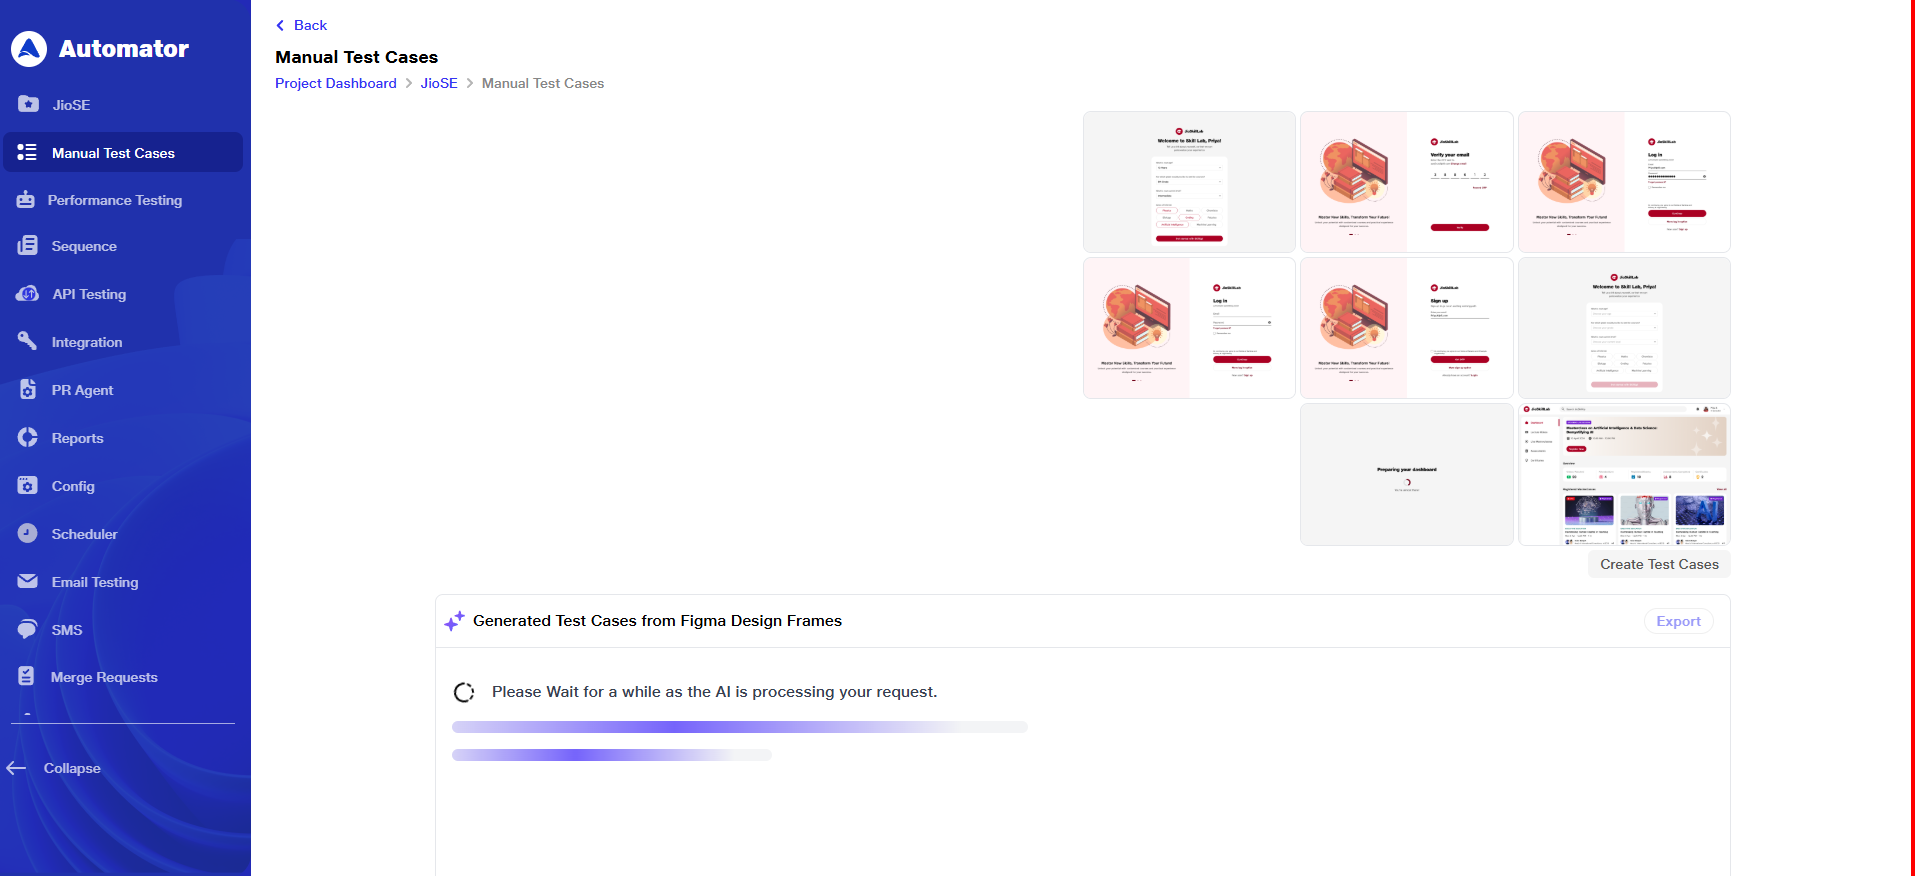 13) Once the data is loaded, the list of test scenarios with their corresponding test steps will be displayed on the screen.
 14) To edit or export, please refer to points 5 and 6.
5) Editing Prompt
a. When you hover your cursor over a generated test case prompt, a pencil icon will appear. This icon indicates the option to edit the prompt.
b. The edit icon is only available for text that the user has added from the prompt.
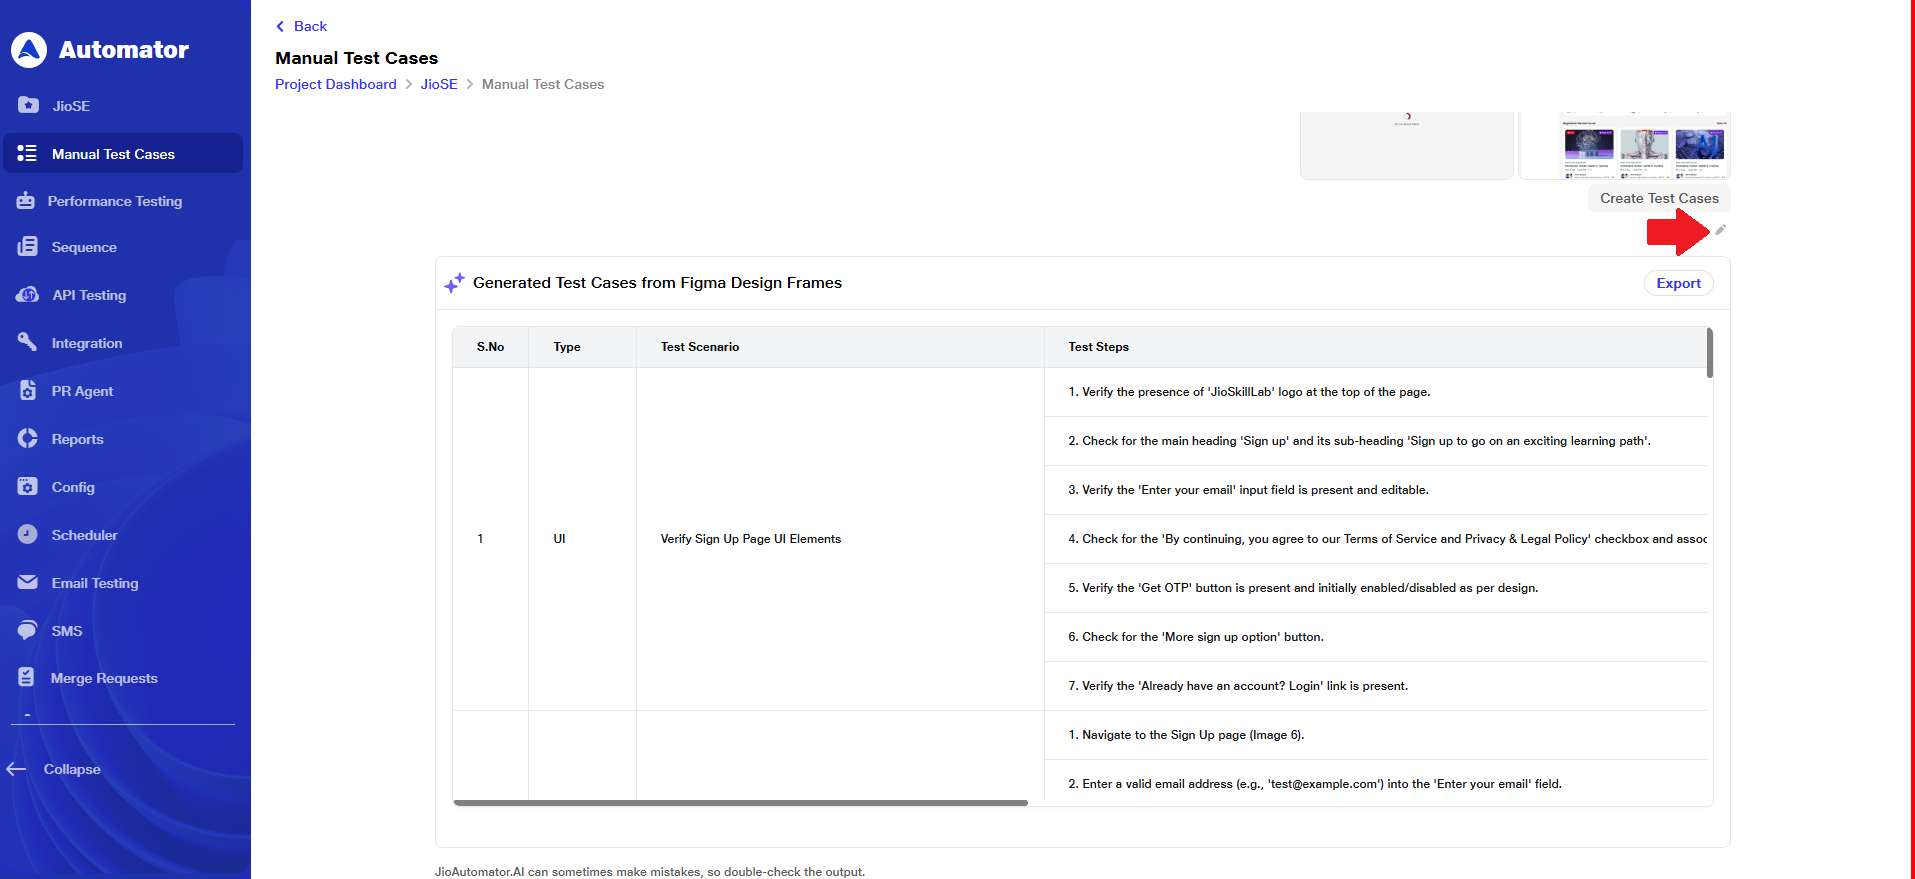 c. Click the pencil icon to open the prompt field, allowing you to modify the existing prompt text.
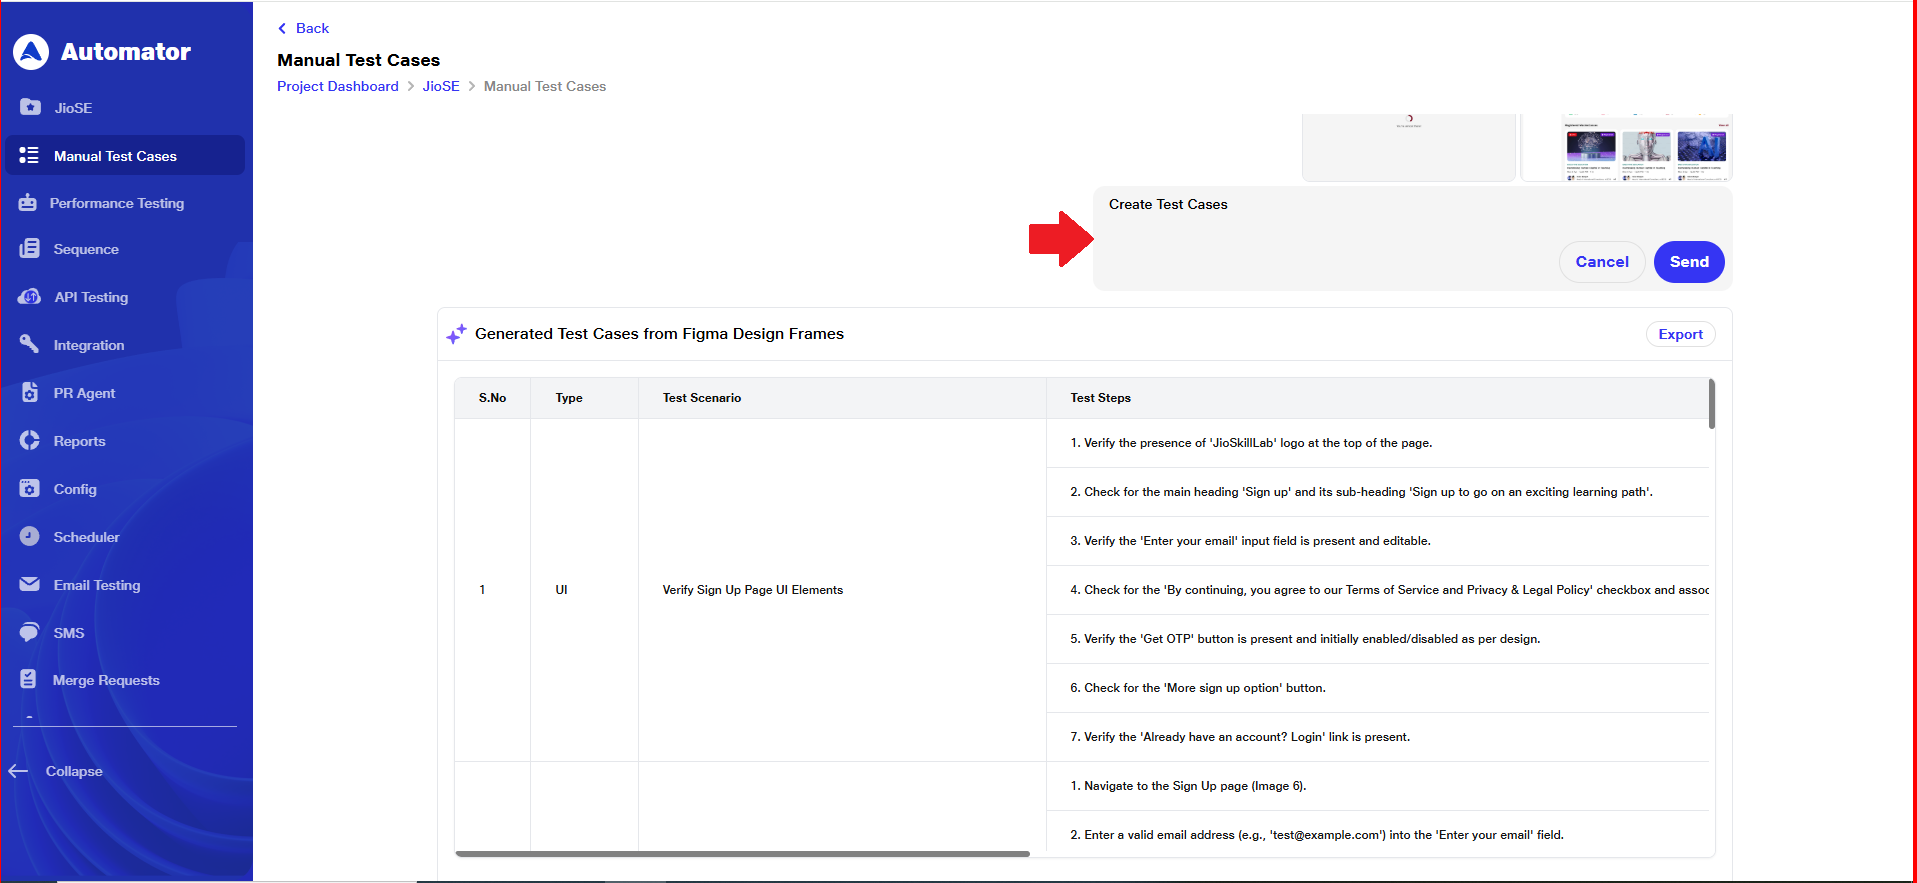 d. Edit the prompt text as needed, then click the Send button to apply your changes.
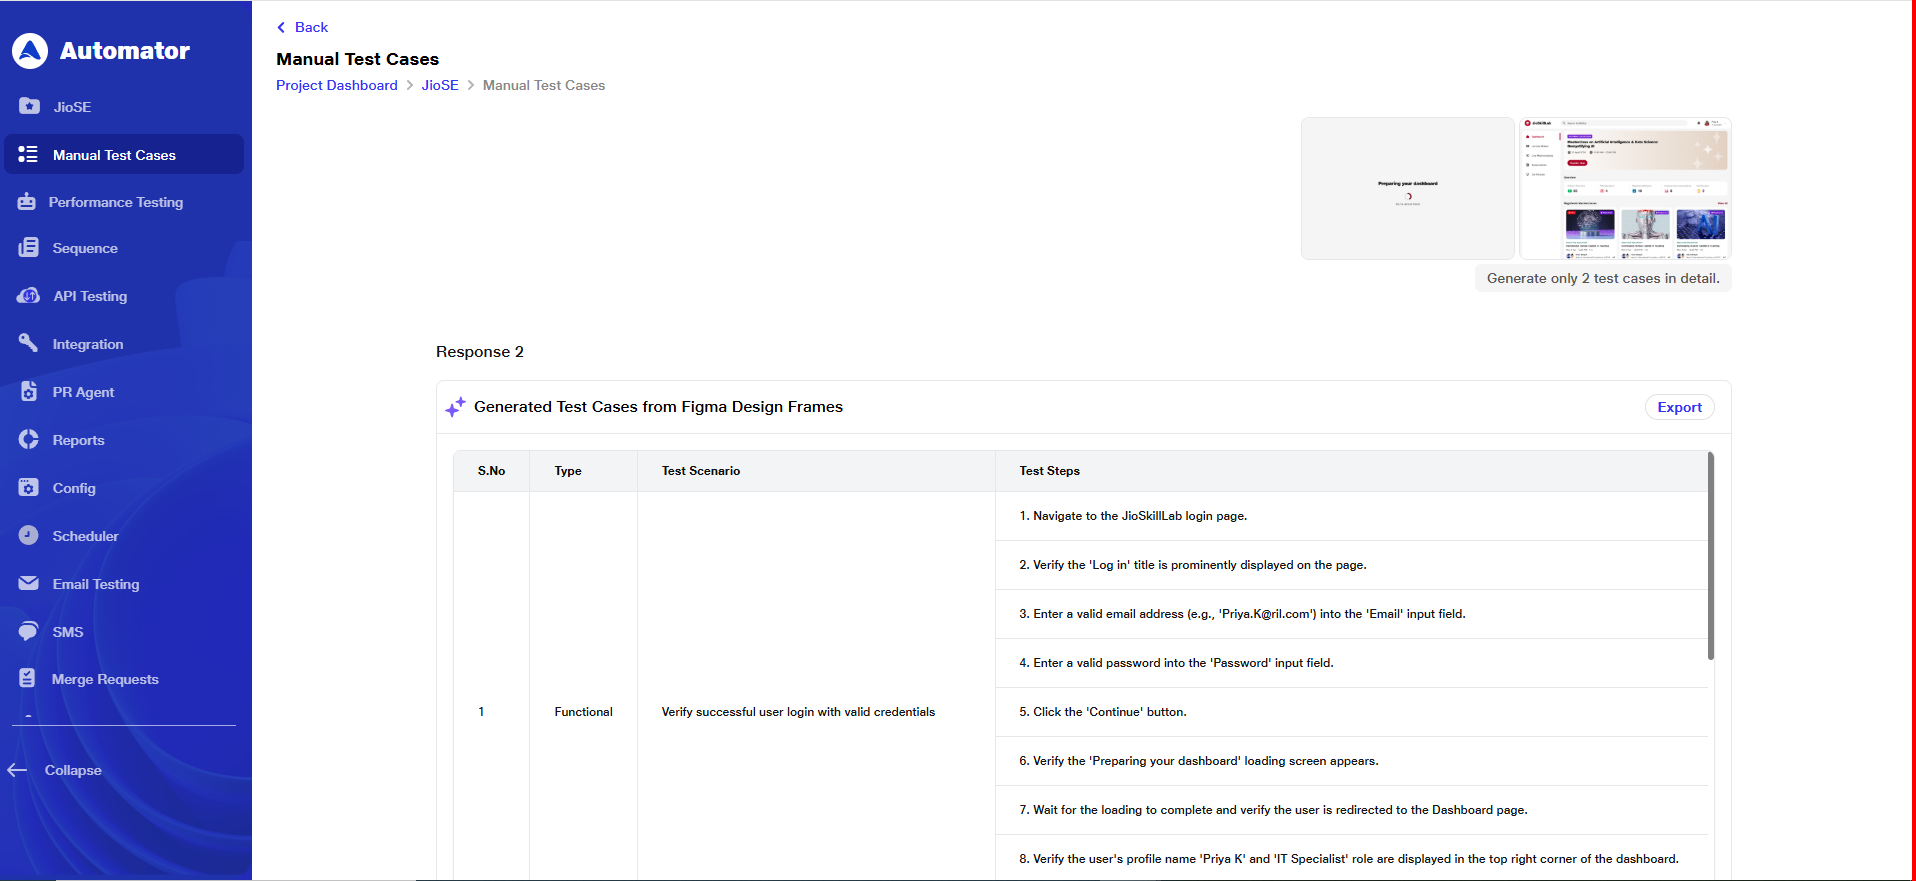
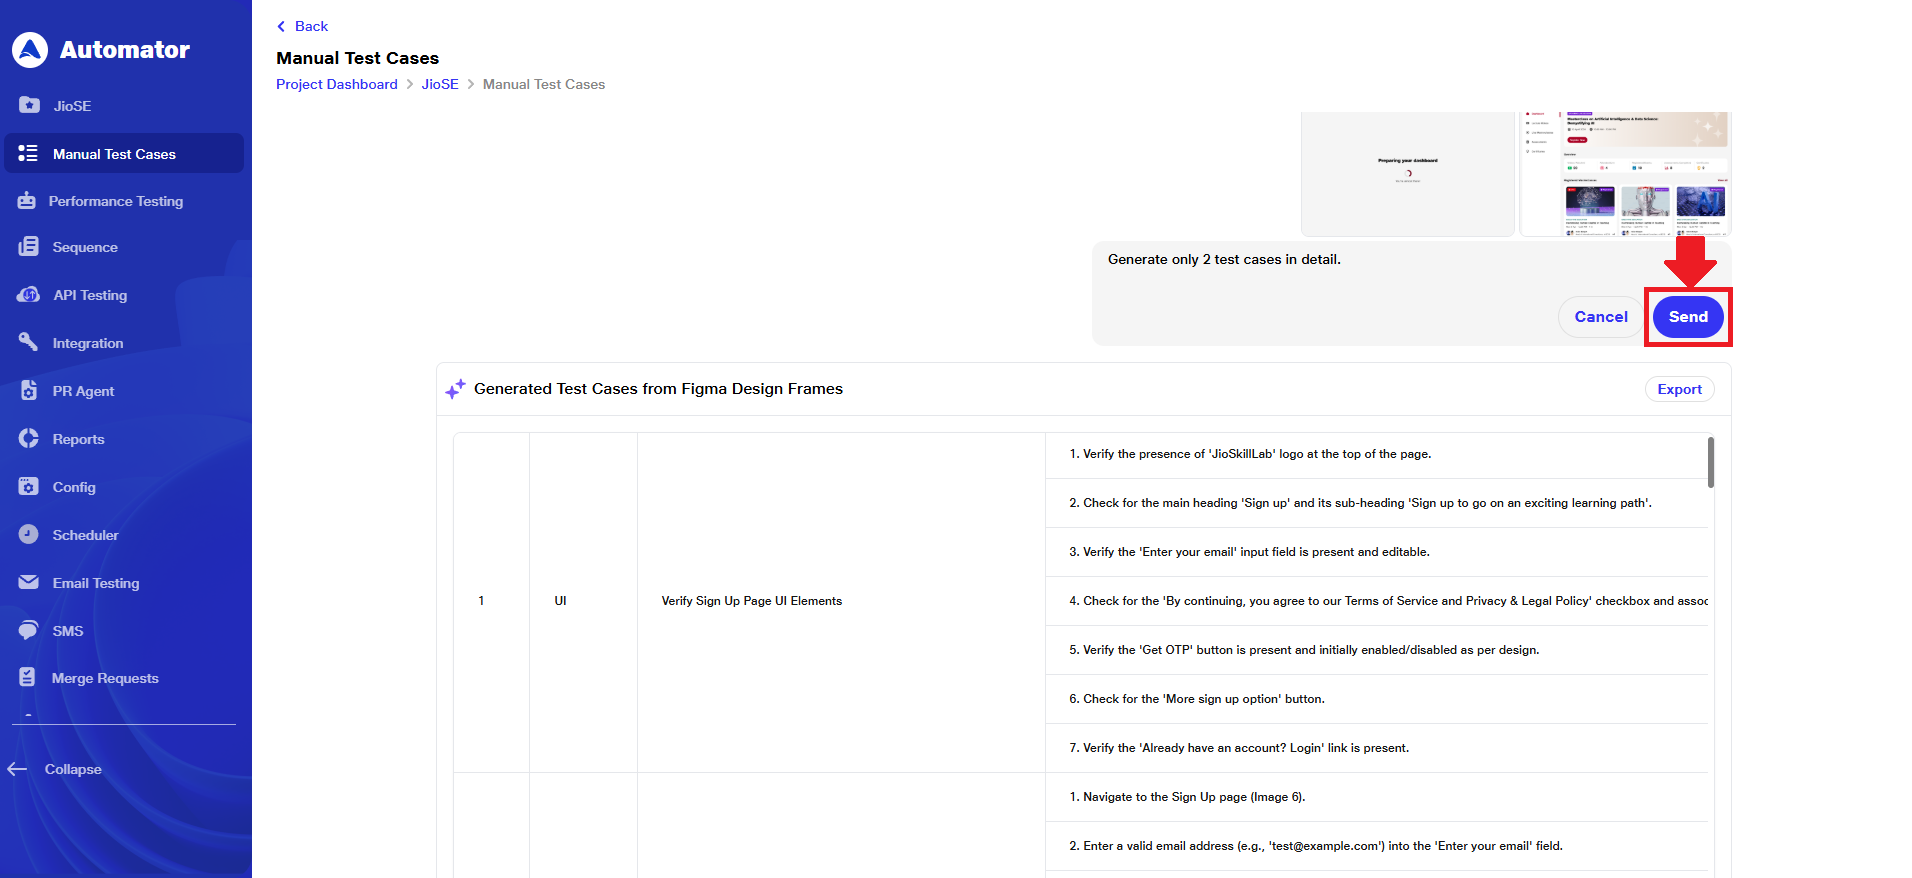 e. After submitting the edited prompt, the AI will analyze the updated input, regenerate the response, and produce scenarios based on the user’s specified requirements. This process may take a short time while the system processes and loads the updated test scenarios.
 f. The updated response will be generated with an incremented response number.
For example, if the original output was labeled Response 1, the revised output will appear as Response 2.
 g. When you hover over the prompt after a revision, right and left arrow icons will appear alongside the edit button.
h. The current response number will be displayed between the two arrows, allowing you to easily identify and switch between different response versions.
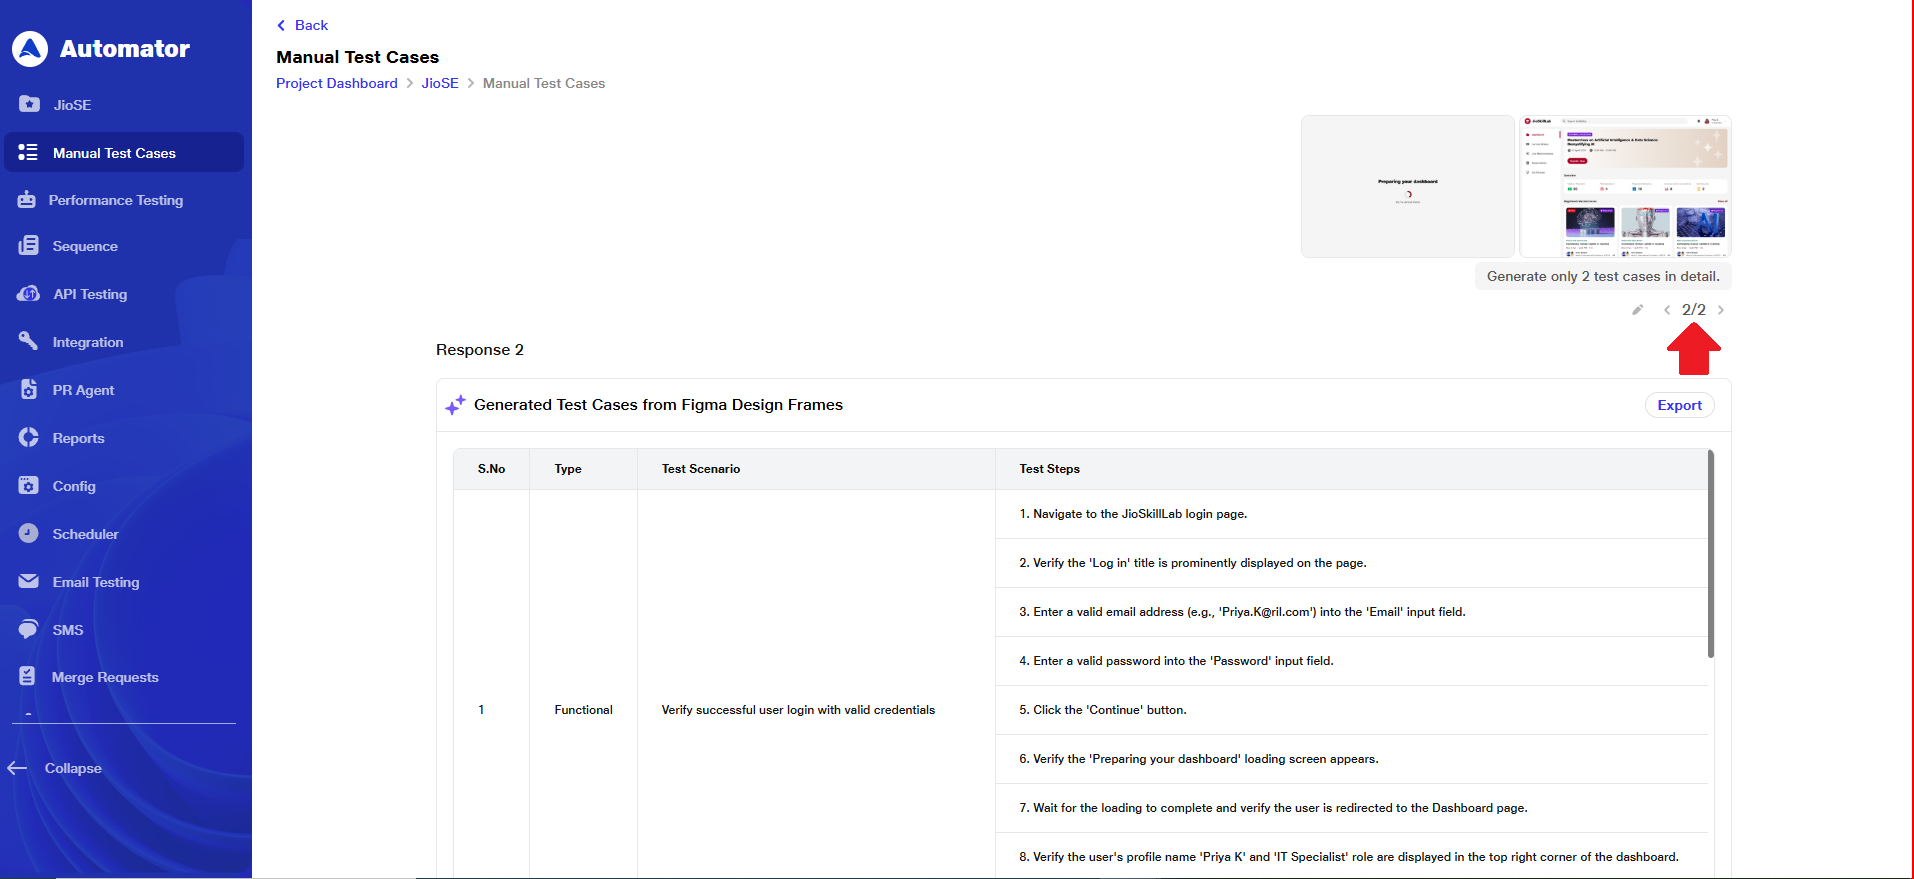 i. Once you have navigated your preferred response version, review the generated content carefully. You can now proceed to use the final output for your testing, documentation, or any other intended purpose.
6) Exporting Test Cases
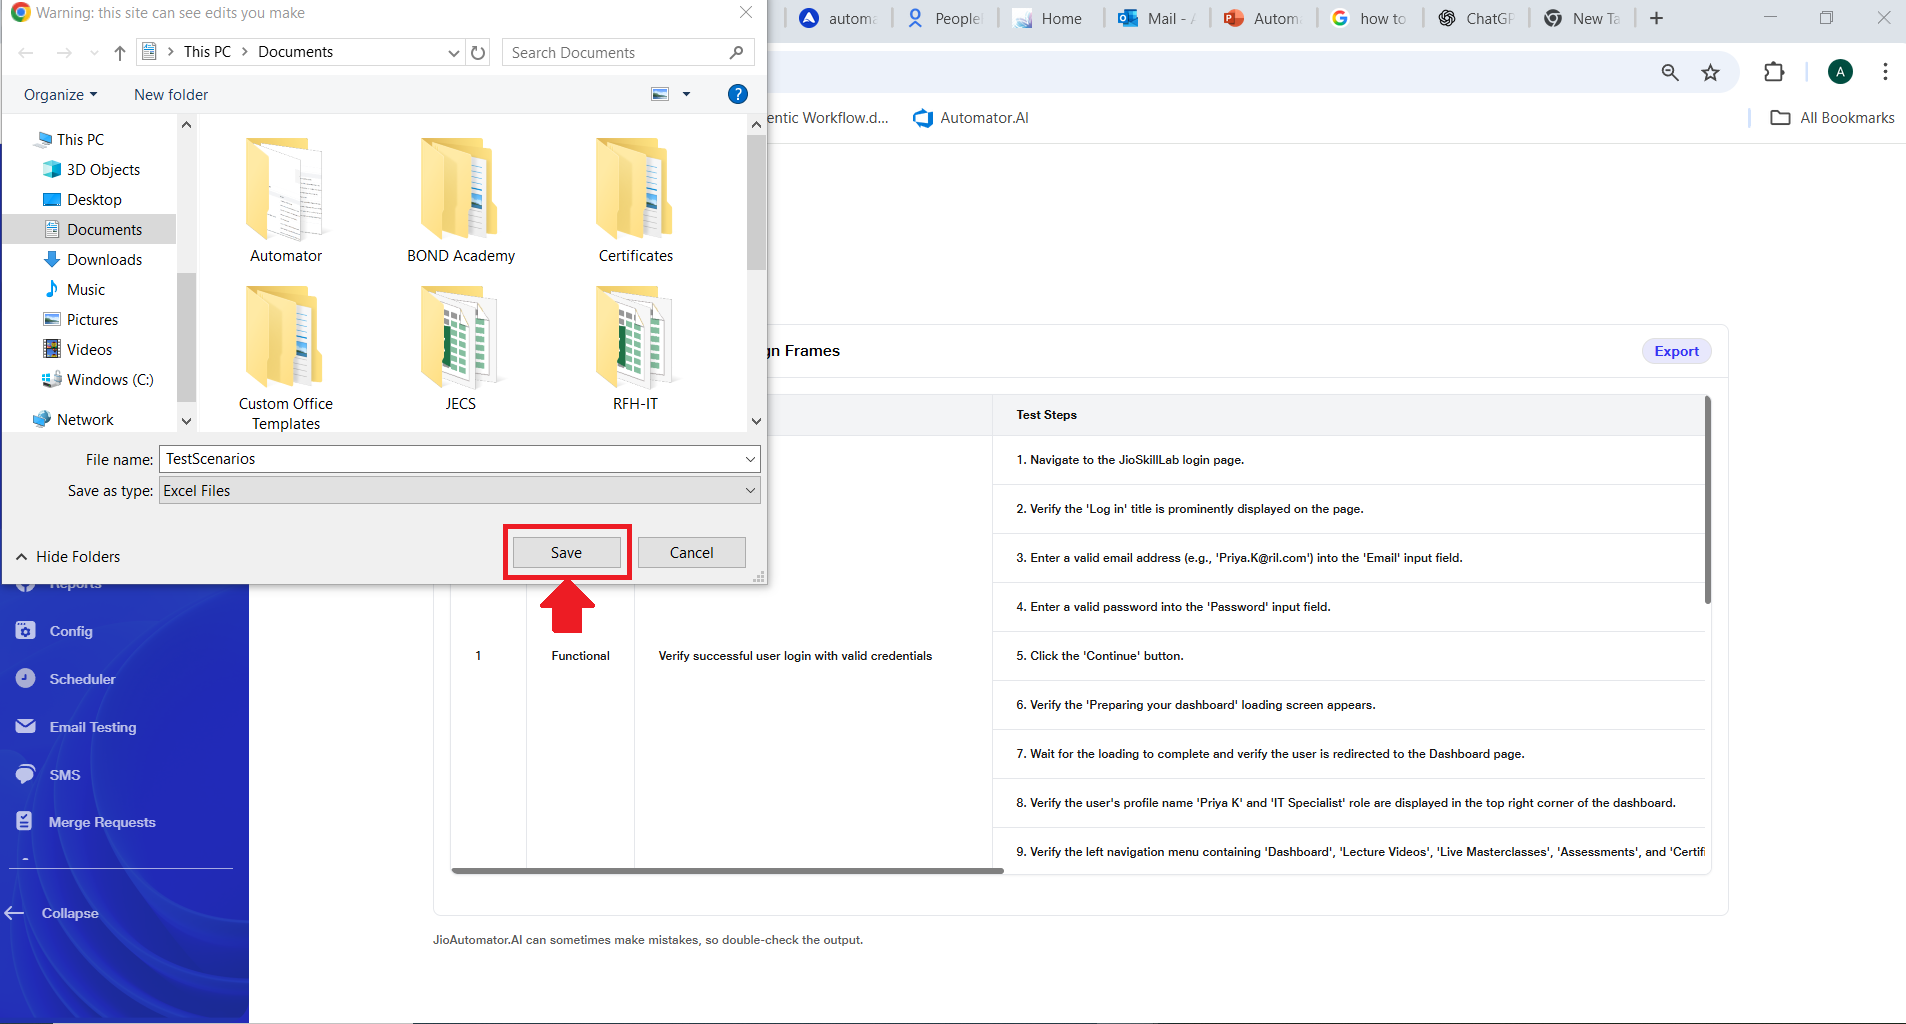
a. At the top of each generated response, an Export button is available for downloading the output (Test Cases).
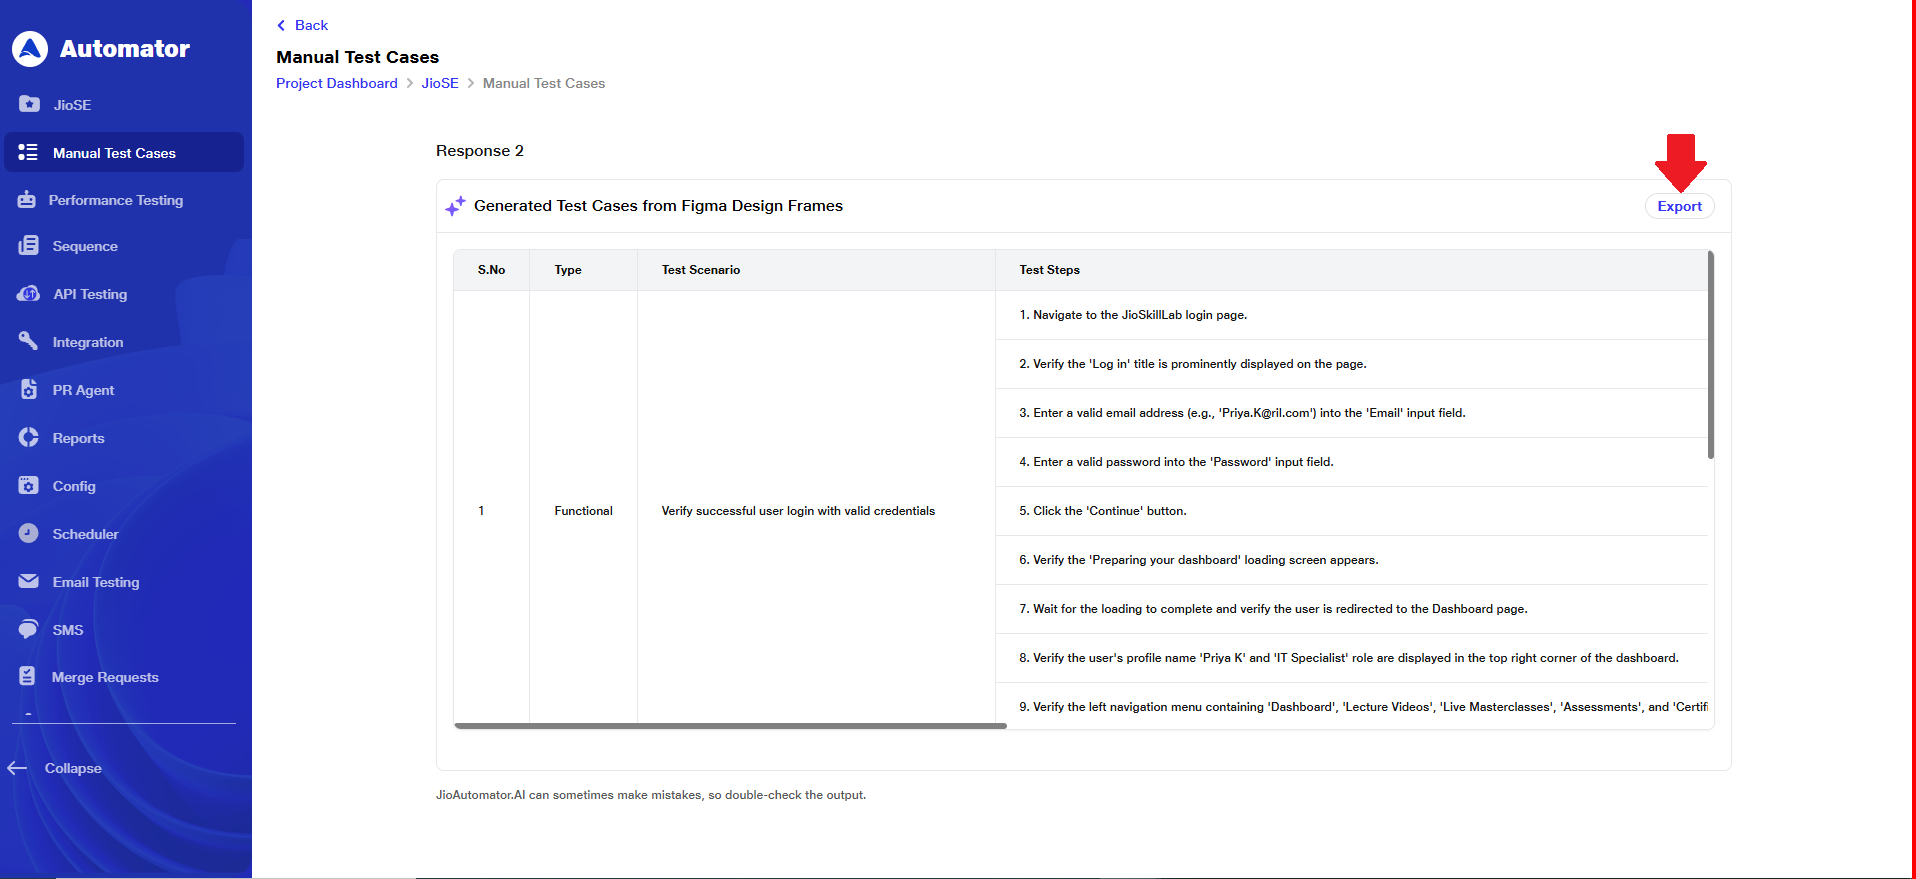 b. Click the Export button to open your device’s save dialog. Choose the preferred location and file name to save the test cases as an Excel file.
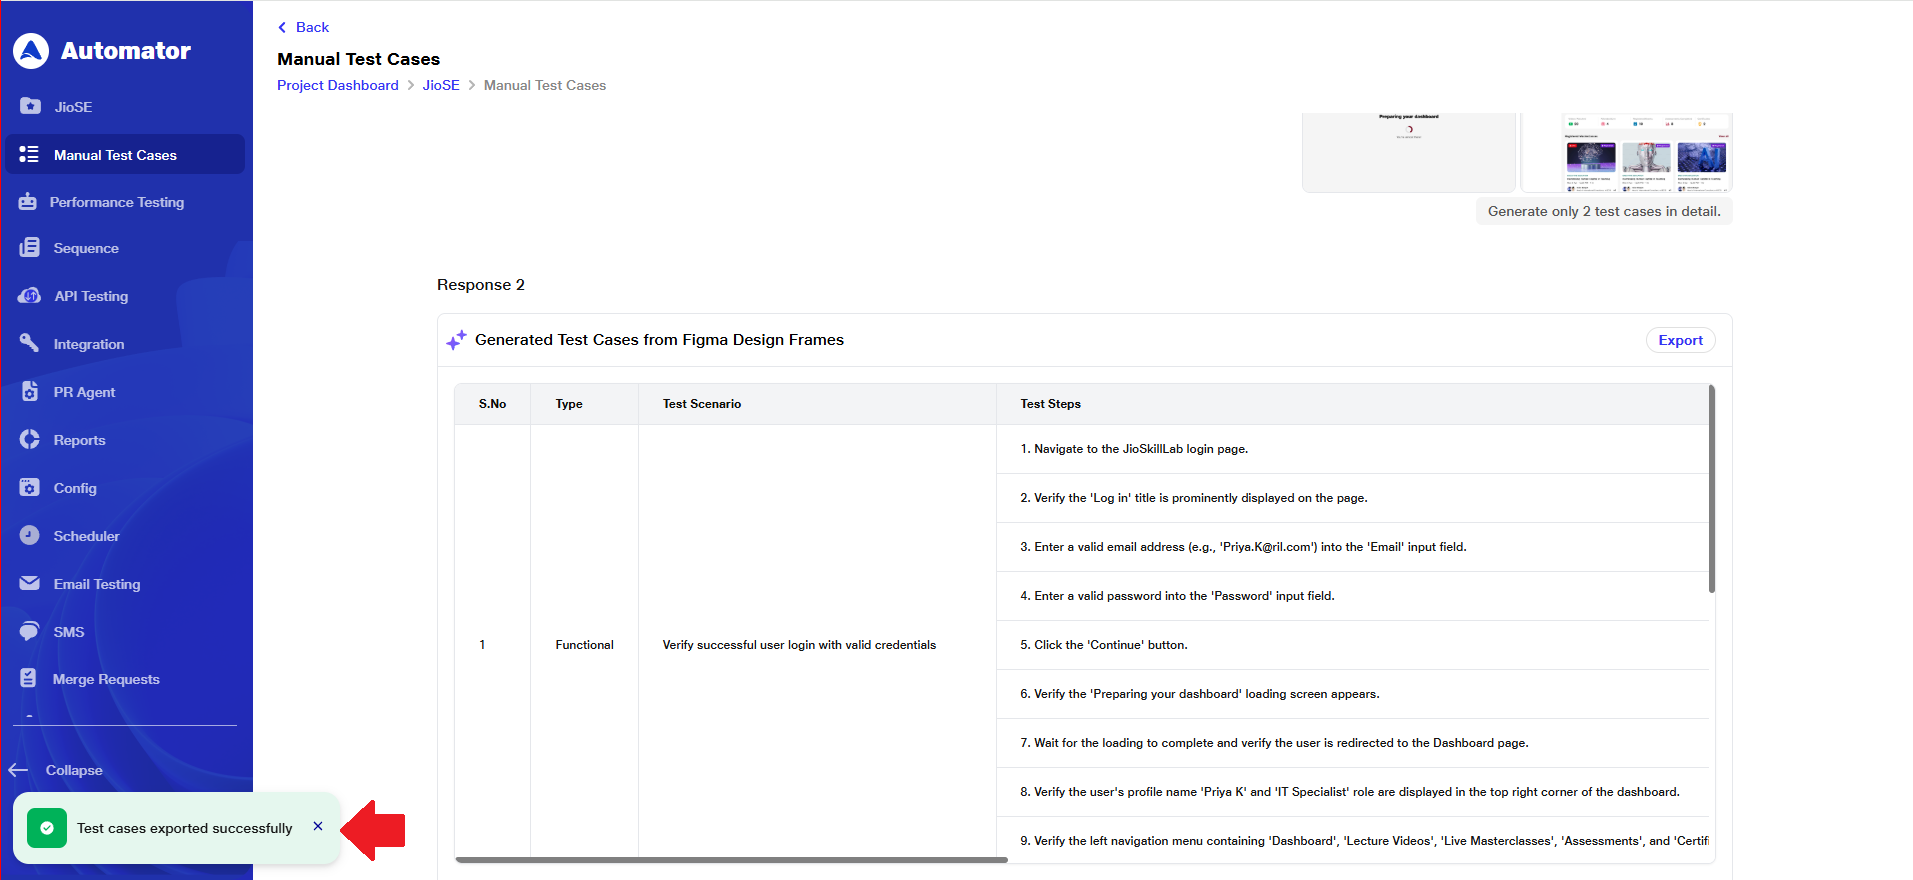
 c.After the file is exported, a toast message, "Test cases exported successfully." will appear at the bottom-left corner of the screen to confirm the export.
 d.Navigate to the location where you saved the Excel file and open it to review the exported test cases.
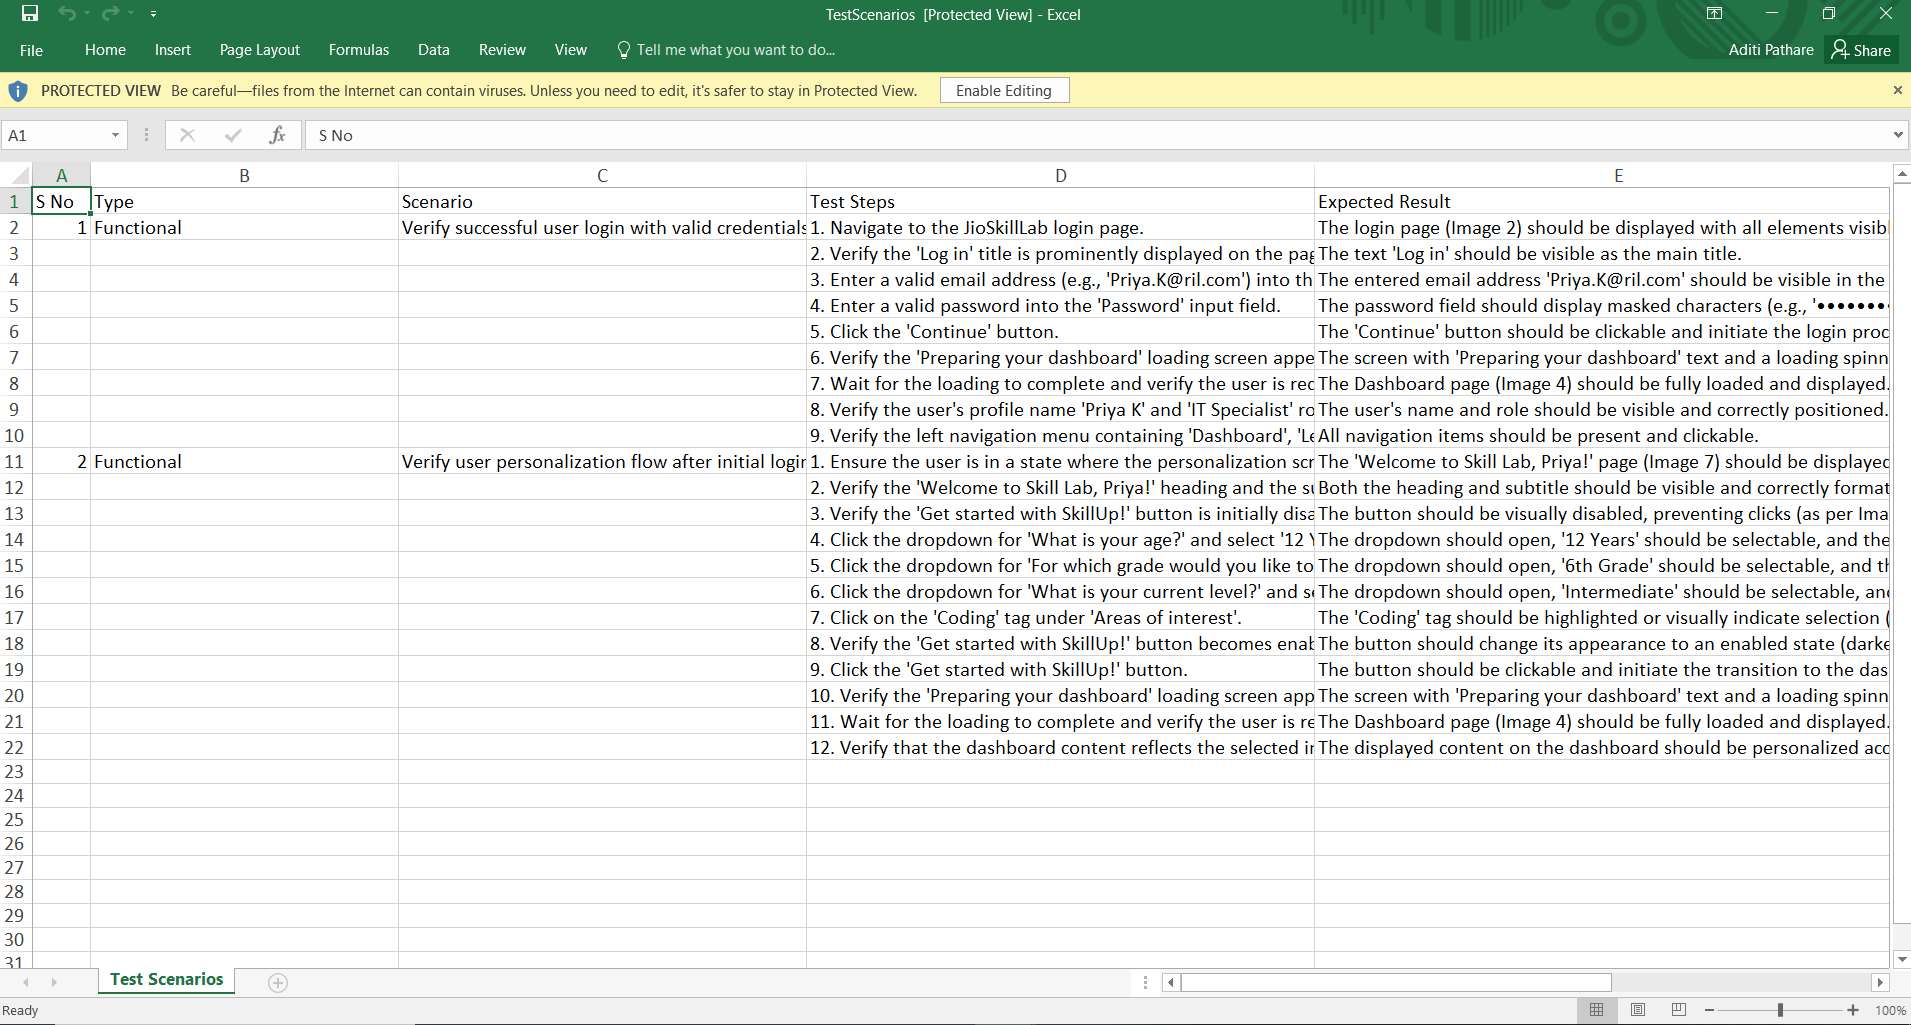 e. You can now use the exported Excel file for reporting, sharing, or further analysis as needed. This completes the export process.
Benefits
1) Automatically generates manual test cases to reduce tester effort and save time.
2) Enhances test coverage by analyzing functional flows and identifying edge cases.
3) Ensure consistency and accuracy in test case structure and content.